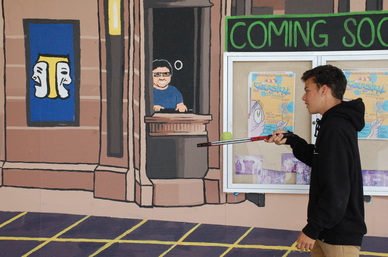
Mood Portraits
Magazine
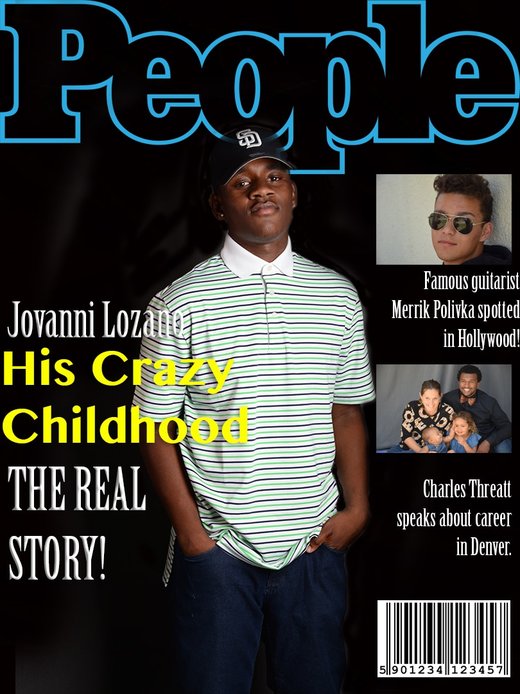
I chose People magazine because this magazine is what I'm most familiar with. I don't often come in come in contact but when I do it's usually People's magazine from when my grandmas brings the from the store. To emulate my magazine to the real thing I had a photo of a real beside my creation and tried to make them look as identical as I could. Such as the colors, fonts, and placement of things helped me create my magazine. The font I used was Birch Std Regular, the color and font i used was because they looked most identical to the real People's magazine.
Family
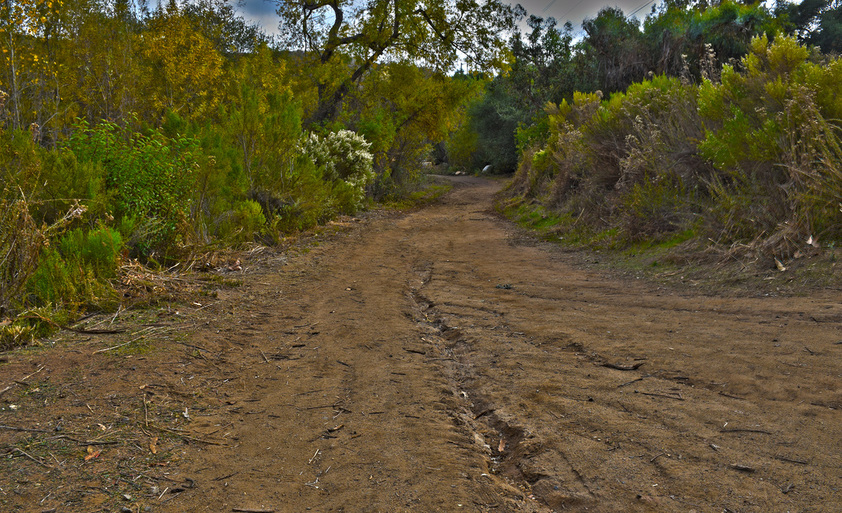
Del-Mar Fair
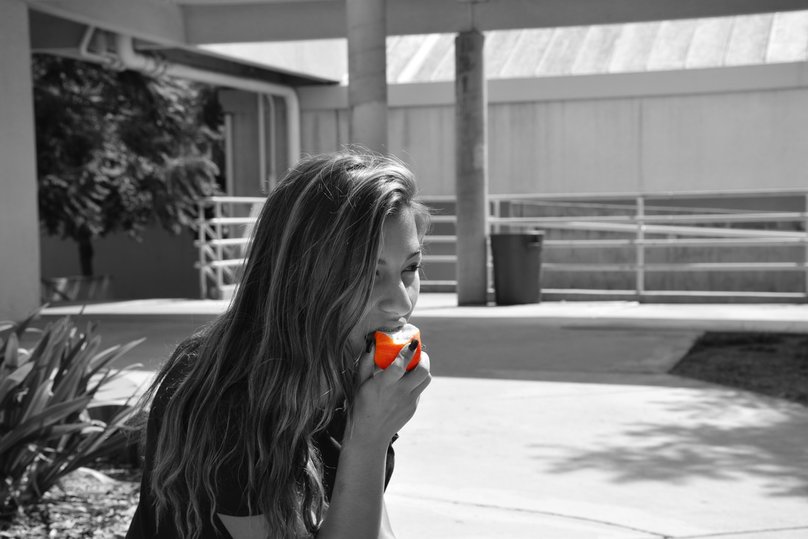
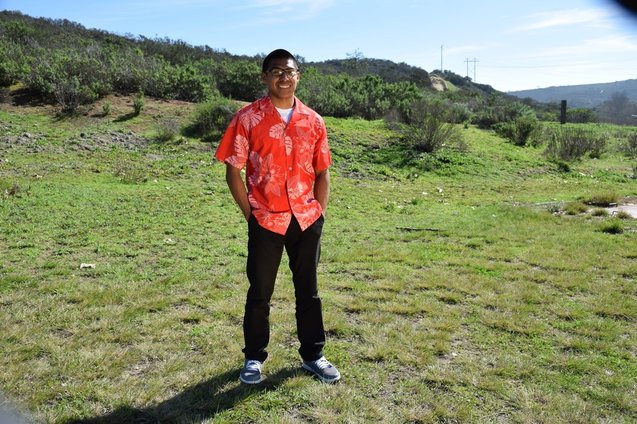
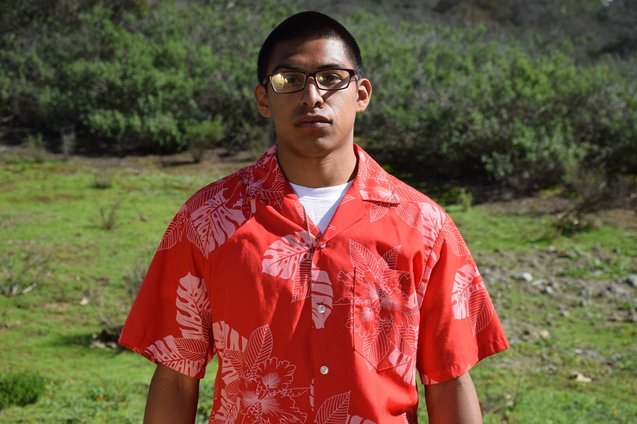
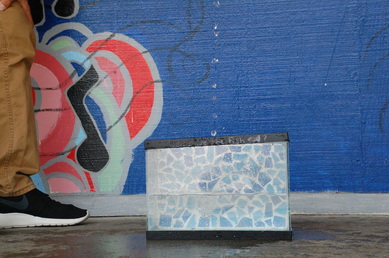
My respect image was taken right in front of my photography class, just a little quick and easy idea of mine. The composition rule of my image is rule of thirds. To capture I used a Nikon D5300 with a 18- 140mm lens. The edits that were made in my photo were by Adobe photoshop. My image was printed on Epson Glossy Photo Paper on the Epson P800 digital printer. I feel like respecting your body is very important because respecting your body also ties in with your health, and I’m sure no one would enjoy having bad health. Respecting your body means to eat healthy, try to exercise, and turn down drugs and alcohol. Eating healthy isn’t easy but after realizing all the changes that will occur to your body you’d be happy with your decision. Respecting your body is an essential aspect of self-respect. The more kindness you show yourself physically, the more confidence you would build as a person. However, self respect isn't always as easy to come by as you may think. There are a lot of things in life that can pull you away from respect. As much as you might want to treat yourself with respect, there are often many outside influences that can get in the way of treating yourself the way you wish.
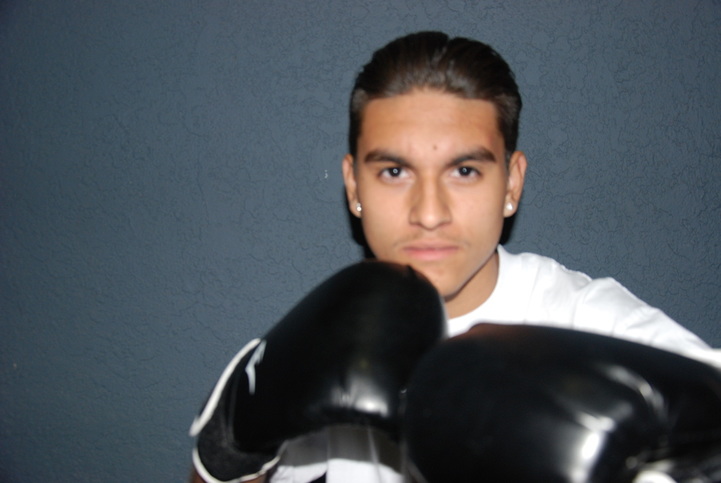
Sports Photography
Composite Project
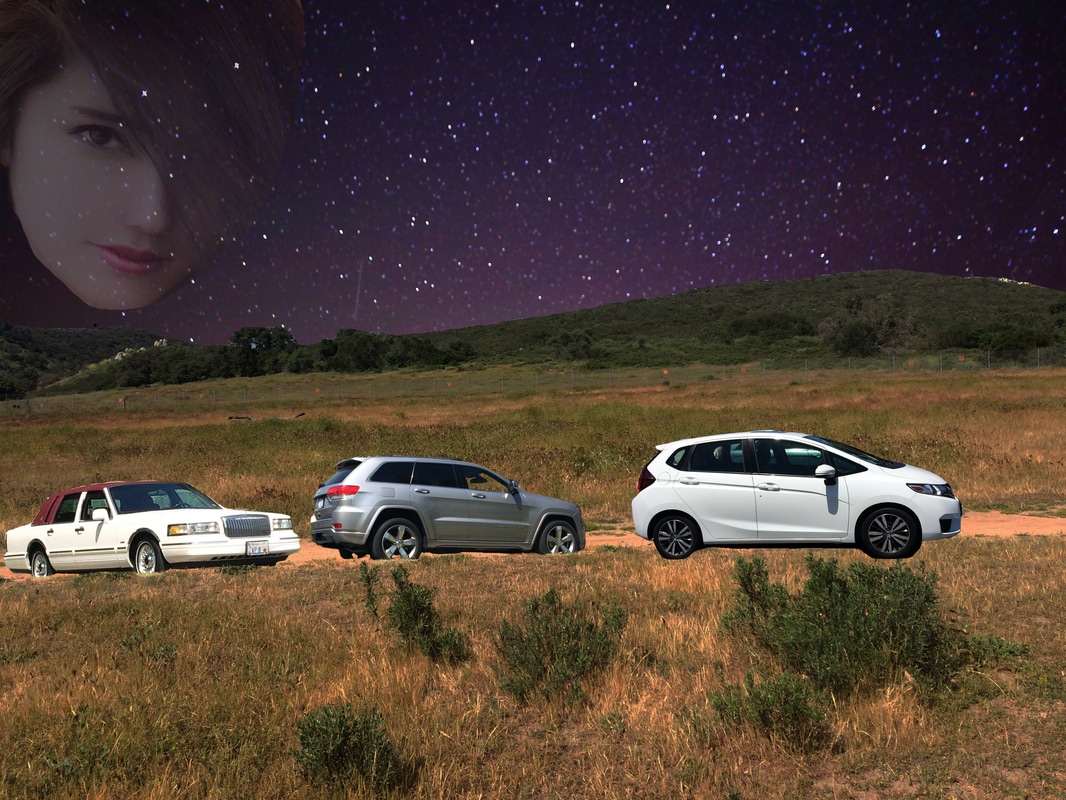
"Get Outta My Dreams, Get Into My Car"
Artist : Billy Ocean
To create my photo I simply used many layer masks. First I placed the picture of the surface first then placed the cars on top of that to make it seem like they were driving away. Next I put a night sky into the picture to capture the dream Billy Ocean sang about in his song. Finally I entered a women's face in the dreamy night sky to symbolize how he was dreaming of a women. I also tried to darken the surface to make it look similar to the sky but it didn't work out how I thought it would.
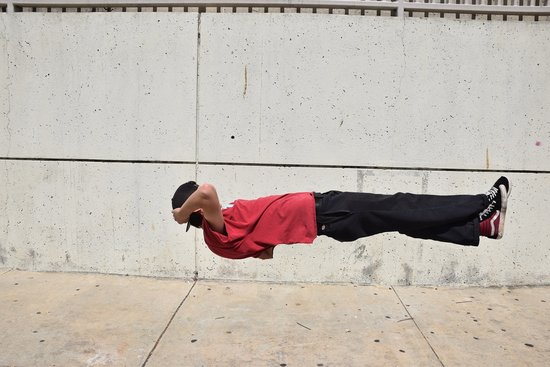
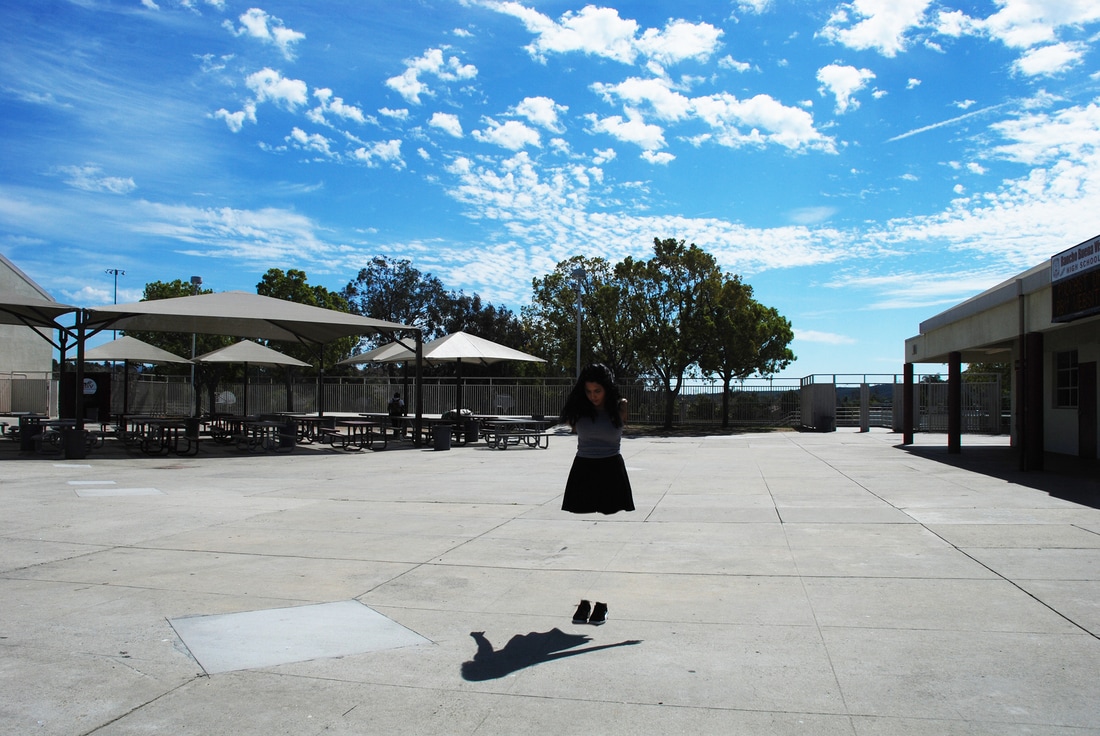
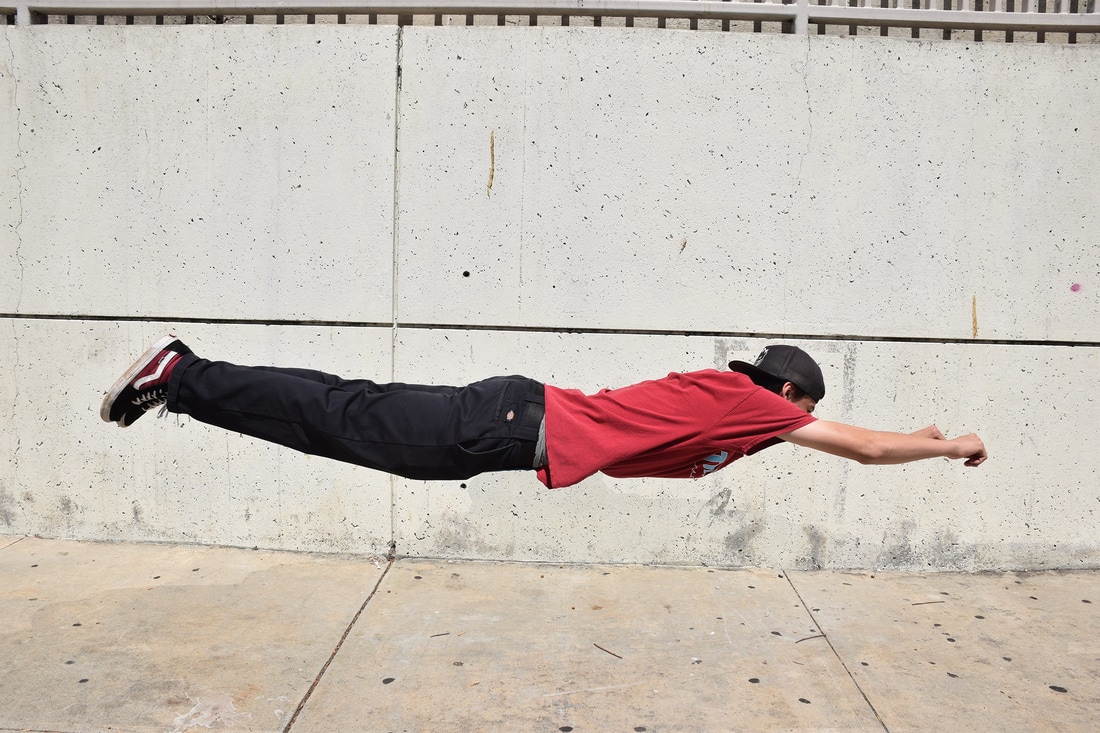
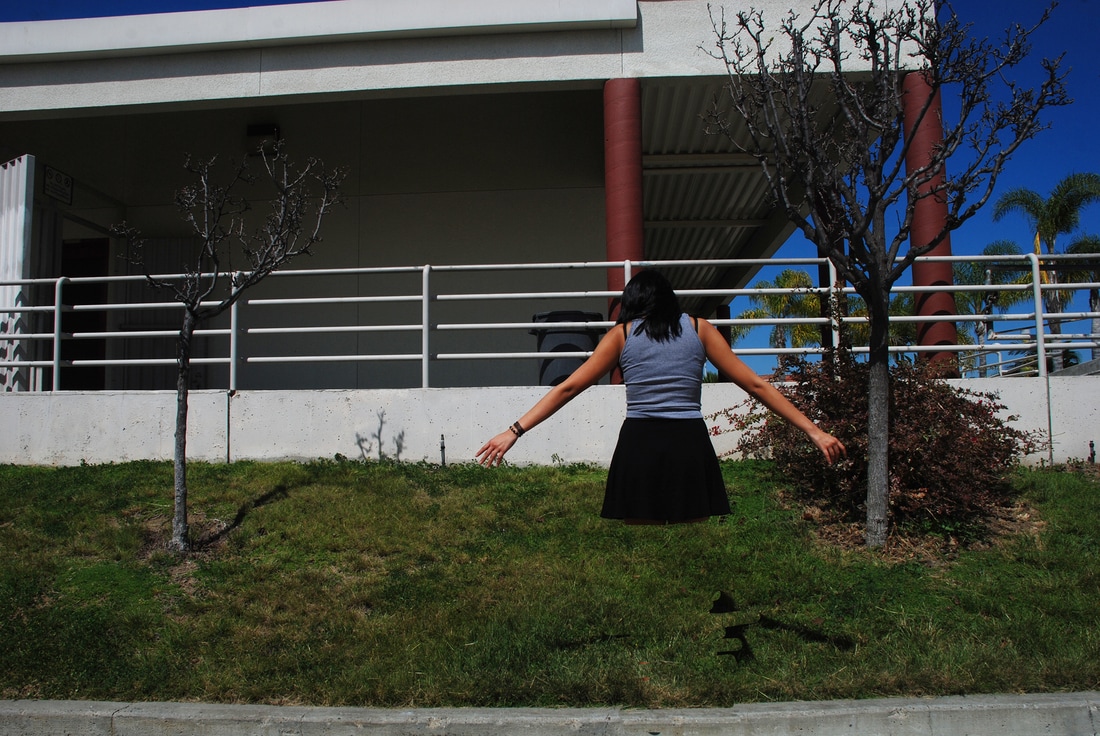
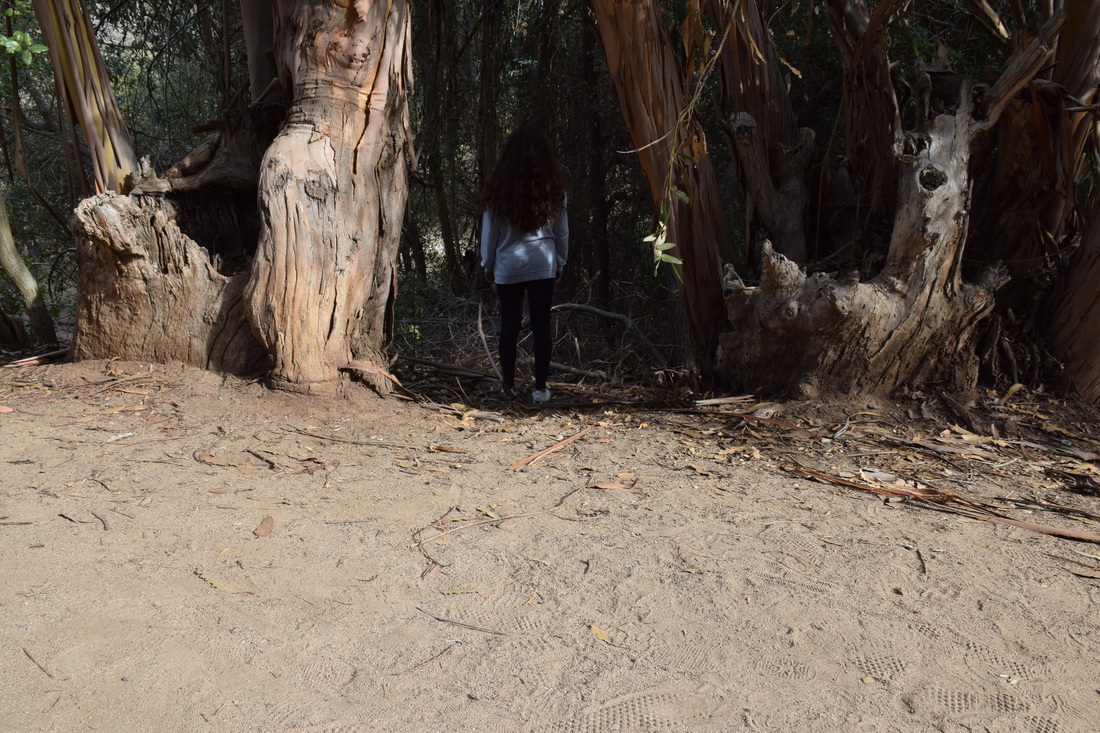
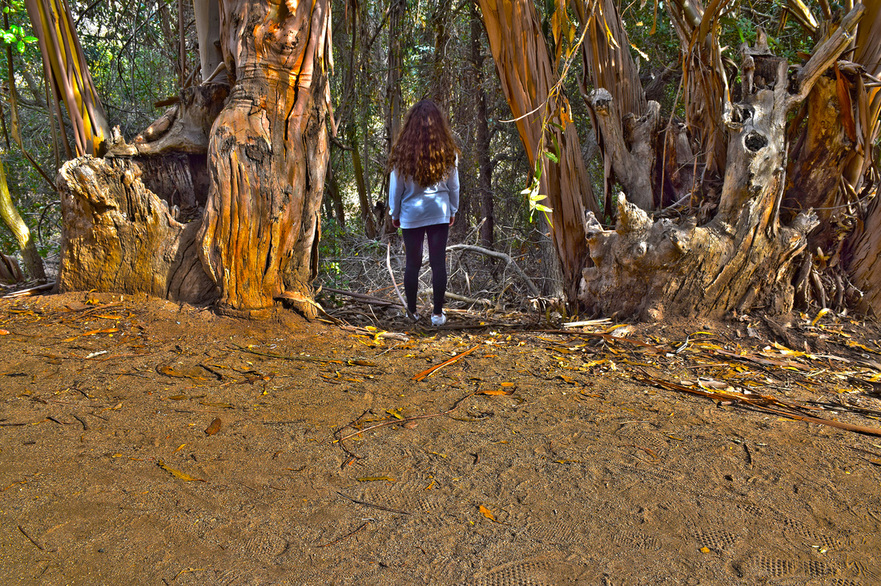
Invisible and Flying
|
|
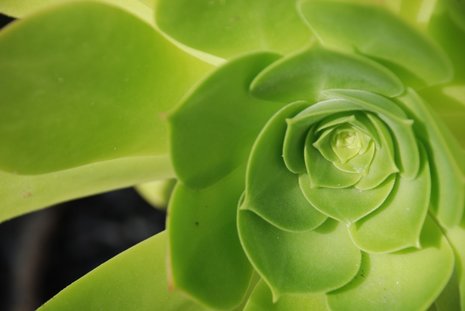
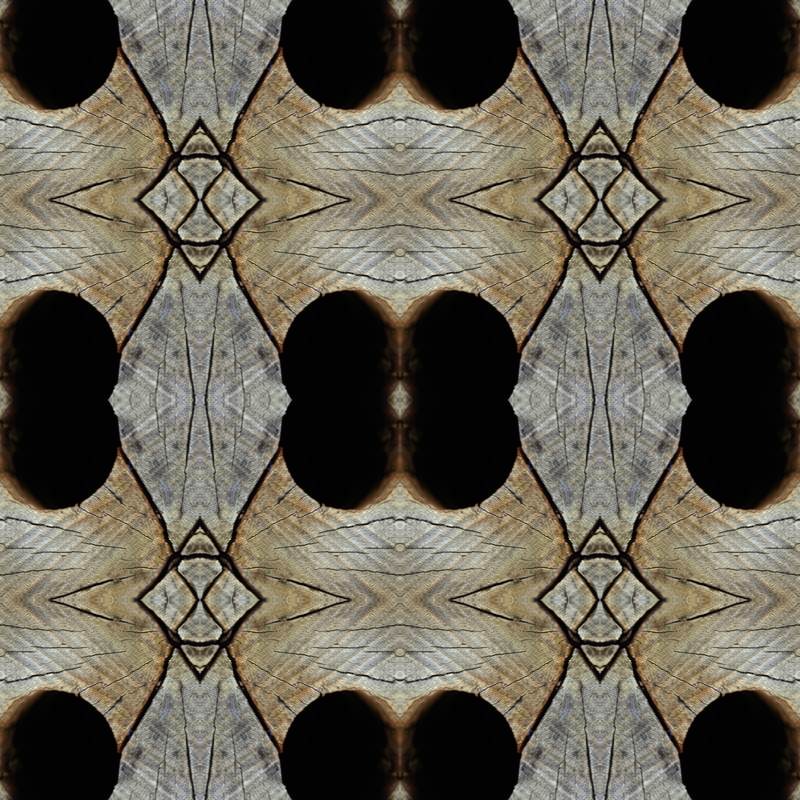
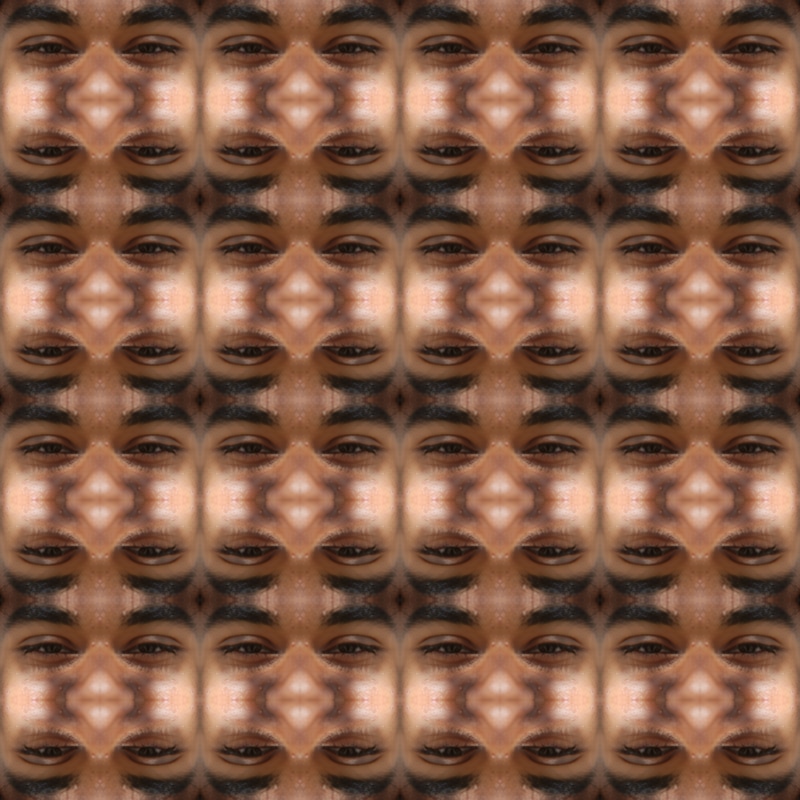
Mandalas
|
|
|

|
|
|
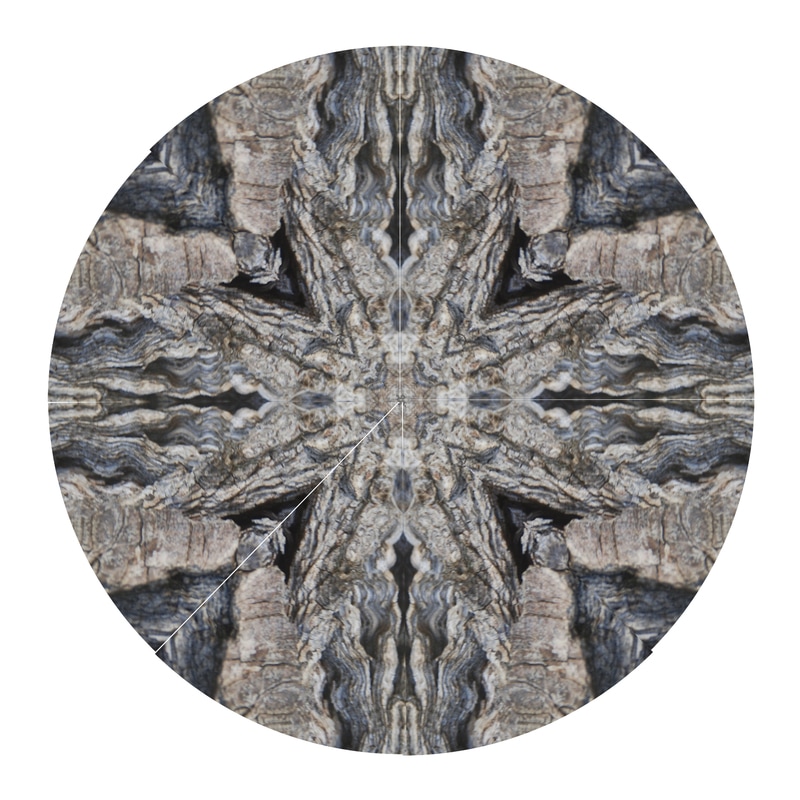
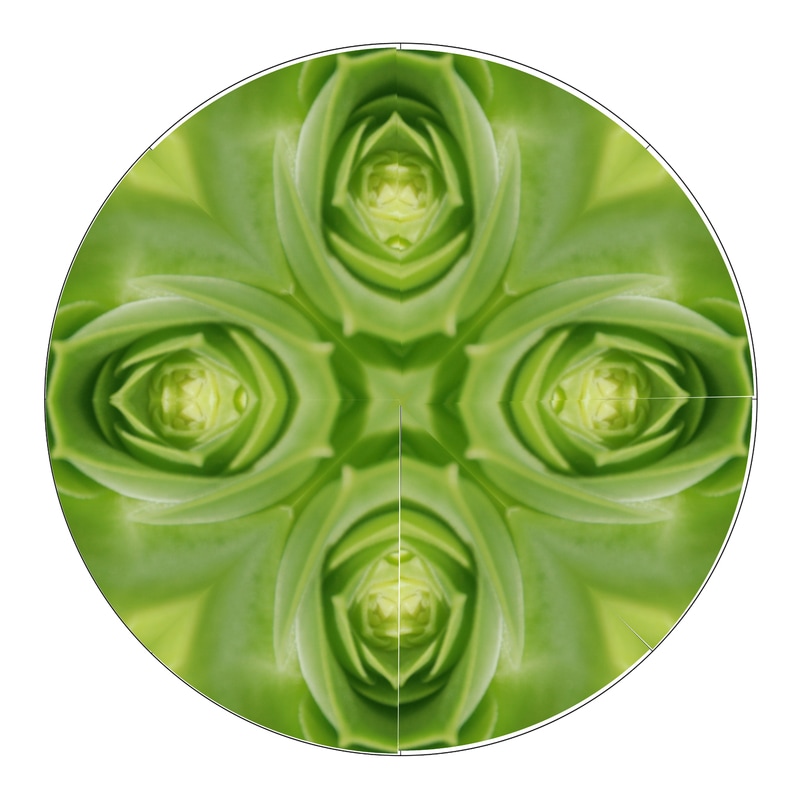
1. A mandala in my own words is a fairly small part of the picture you take to create a reflection of the image all around, which then creates a circular image.
2. To create my mandalas I had to create guidelines so I knew where to place my photos. Once the guidelines were made I placed my cropped photo into the empty spaces. Every other picture in the mandala either has to be flipped either horizontally or vertically. Once all of this is complete you merge the layers visible.
3.
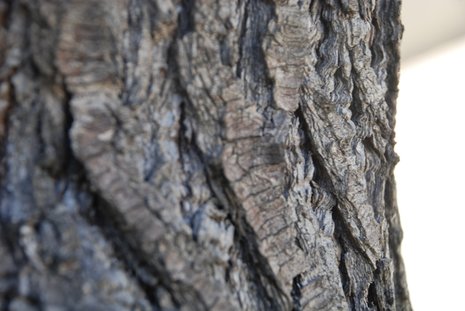
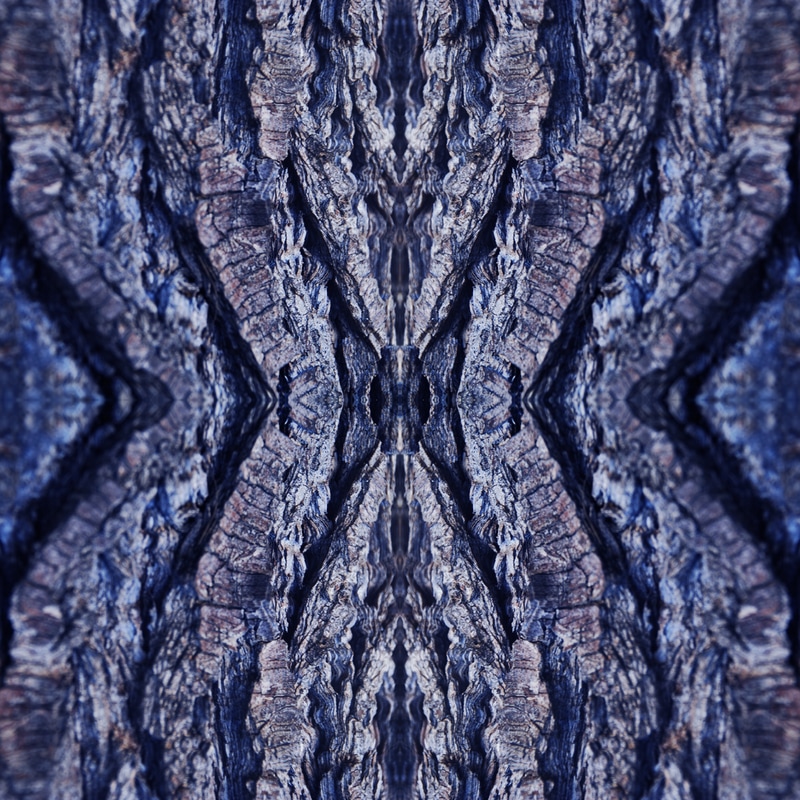
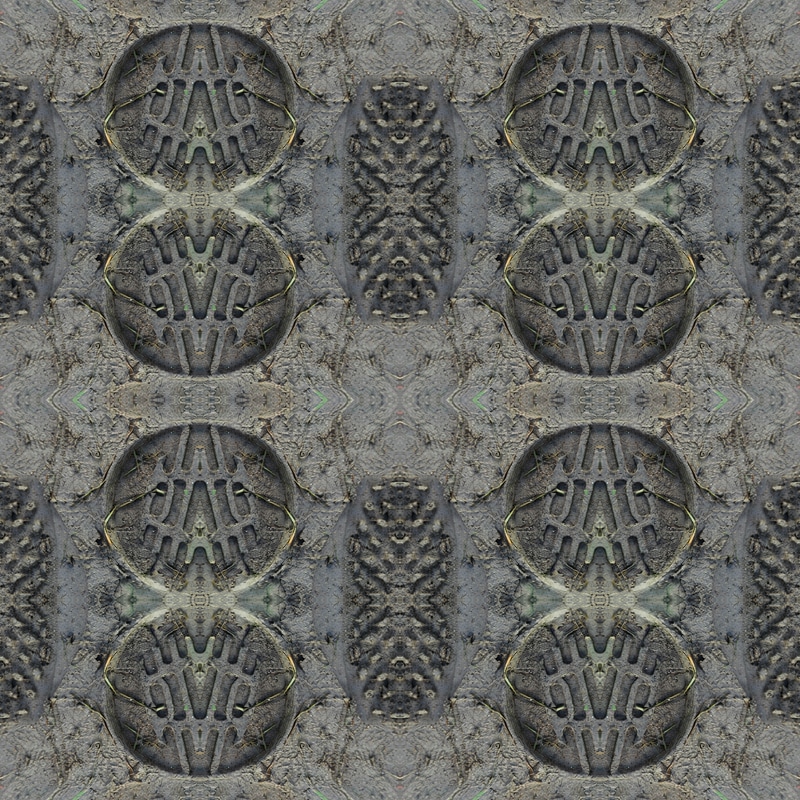
Tessellations
|

|
|
|
|
|
|
|
|
|
1. A tesselation, in my own words is a fairly small part of the picture you take to create a reflection of the image all around.
2. To create my tesselations I had to create guidelines so I knew where to place my photos. Once the guidelines were made I placed my cropped photo into the empty spaces. Every other picture in the tessellation either has to be flipped either horizontally or vertically. Once all of this is complete you merge the layers visible.
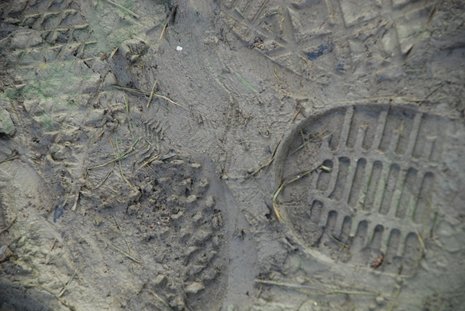
3. What I liked was the outcome of the photos. I didn't think I would've been able to make a tessellation. My favorite photo out of all was the footprints into the mud.
4. I struggled the most with making the guidelines.
5. If I'd go over it I'd probably change up the colors a little bit.
2. To create my tesselations I had to create guidelines so I knew where to place my photos. Once the guidelines were made I placed my cropped photo into the empty spaces. Every other picture in the tessellation either has to be flipped either horizontally or vertically. Once all of this is complete you merge the layers visible.
3. What I liked was the outcome of the photos. I didn't think I would've been able to make a tessellation. My favorite photo out of all was the footprints into the mud.
4. I struggled the most with making the guidelines.
5. If I'd go over it I'd probably change up the colors a little bit.
Portraiture
f/8, ISO 200, Shutter Speed 1/350

f/8, ISO 200, Shutter Speed 1/500
f/8, ISO 200, Shutter Speed 1/500
f/8, ISO 200, Shutter Speed 1/500
f/8, ISO 200, Shutter Speed 1/500
f/8, ISO 200, Shutter Speed 1/500
1. One thing I learned from this portraiture is that it is very important to keep trash or useless objects in the background of your photo, also it is very easy to ruin a good photo.
2. To decide on the poses of my model were all made by Ms.Moncure, she provided us with a sheet full of poses to use. I think it was helpful because without it everyone one maybe would have had the same basic poses.
3. The reflector was very helpful. I say this because it makes the skin really pop out and glow. It gives a better looking feel to the models skin.
4. To retouch the three photos I used photoshop. In photoshop I uses the lasso tool outline the face of the model. After this I used the blur tool to touch up the skin to give it a softer look. After this my model had no other blemishes or scars on its face so other than that I only had to adjust the size of the photo.
5.If you're working with a large company like JC Penny Portrait Studios, Picture People, or SharpShooter Imaging, you'll most likely have a chance of moving up with the company in management roles. If you have several years experience with photography you might be able to teach photography or own your own studio. Skilled photographers charge thousands to shoot a wedding or other big events.
Food Photography

Spicy Crunch, f/8, ISO 200, Shutter Speed 1/125

Spicy Crunch, f/8, ISO 200, Shutter Speed 1/90

Spicy Crunch, f/8, ISO 200, Shutter Speed 1/90

Spicy Crunch, f/8, ISO 200, Shutter Speed 1/3,000
Spicy Crunch, f/8, ISO 200, Shutter Speed 1/125

Spicy Crunch, f/1.8, ISO 200, Shutter Speed 1/3,000
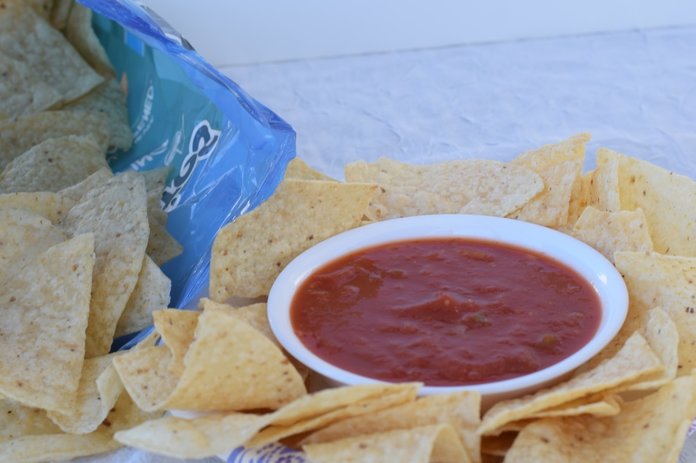
For my food I brought tortilla chips and salsa. I wasn't sure about what props that can be added into my photo to change the look to it, so I sadly decided not to use any. Once thing I learned from this is with food photography you need to take different photos from different angles to make the food look tasty and attractive. I tried my best to make the food look as attracting as it can be but I found it difficult because it was just chips and salsa. Some careers that use photography can be a chef, possibly a food tester, and also businesses that own the food company. In food photography I believe you've taken a successful when you attract he viewers attention into your food you photographed.
Name Project
Layer Masks

The career I chose is a sports commentator. I chose this because all my life I've been around sports, playing sports and watching them. I would enjoy this as a career because you're given the opportunity to meet and talk to professional athletes. Another reason I would enjoy this career because I feel like I'm educated in many sports. Me and my friends are always having arguments and discussions about different players and teams we think are the best. A typical day on this job would be in a studio getting prepared to be on TV. Sports commentators isn't a very easy profession because you're being televised while you're having a discussions about different thinks containing sports, that being said you have to know exactly what you're talking about because you do not want to make false statements and being called out on it on live TV.

The meaning in this photo was to photoshop myself next to Lebron James. If I was able to meet a famous person it would be Lebron James because in my opinion he is the greatest to ever play basketball. The best player to ever play always becomes an argument when talking about it with anybody. I also admire Lebron because away from basketball he is a very caring person. Just like any other NBA player he has had fundraisers for certain areas around the world without much money, this shows he isn't selfish because some rich people don't think about the people who have less. I grew up watching him so he is a big role model in my life and some day I wish to be as successful as him.
HDR Compensations
Rule of Thirds

ISO 200, f/16, 1/90
|
|
Symmatery
|
|
Crop
ISO 200, f/16, 1/8
|
|
Frame
ISO 200, f/16, 1/30
|
|
Line
ISO 200, f/16, 1/125
|
|
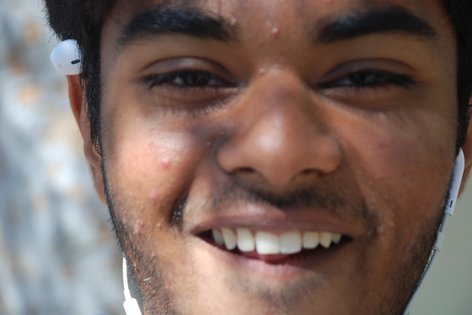
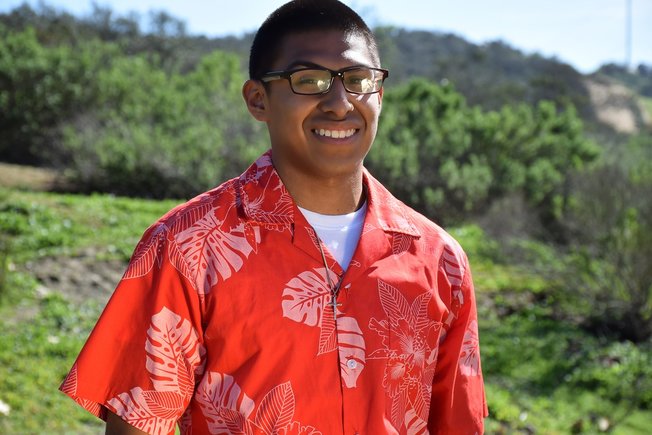
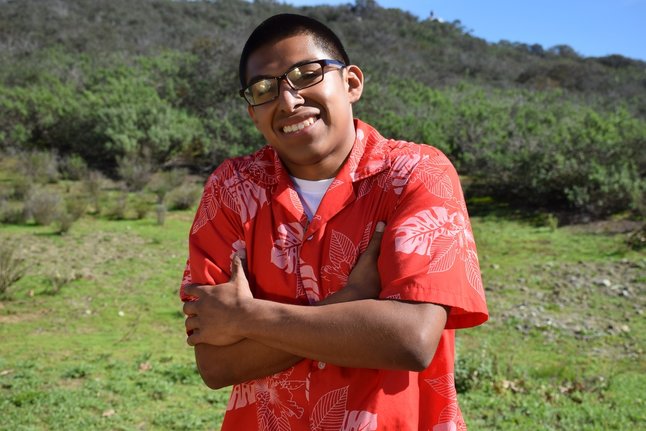
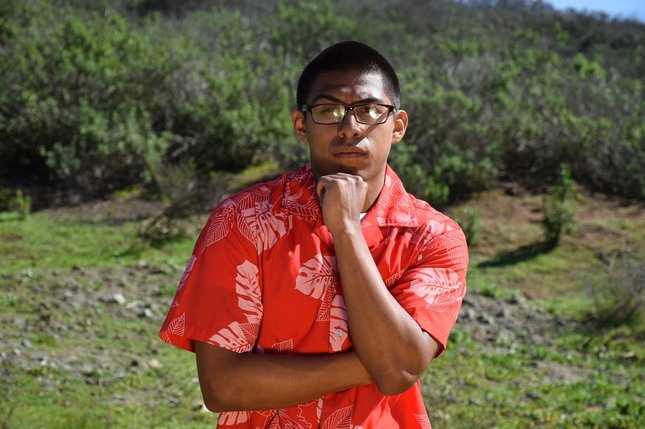
Artist As Mentor
In the style of Tim Mantoani
ISO 400, f/4.8, 1/60
ISO 400, f/4.8, 1/60
ISO 400, f/4.8, 1/60
ISO 400, f/4.2, 1/60
ISO 400, f/4.8, 1/60
Tim Mantoani
docs.google.com/presentation/d/1JpXqNJXw2LI12mUKGi3nCT18378W1o1OeqVAY3f_JpU/edit?usp=sharing
docs.google.com/presentation/d/1JpXqNJXw2LI12mUKGi3nCT18378W1o1OeqVAY3f_JpU/edit?usp=sharing
Super Moon
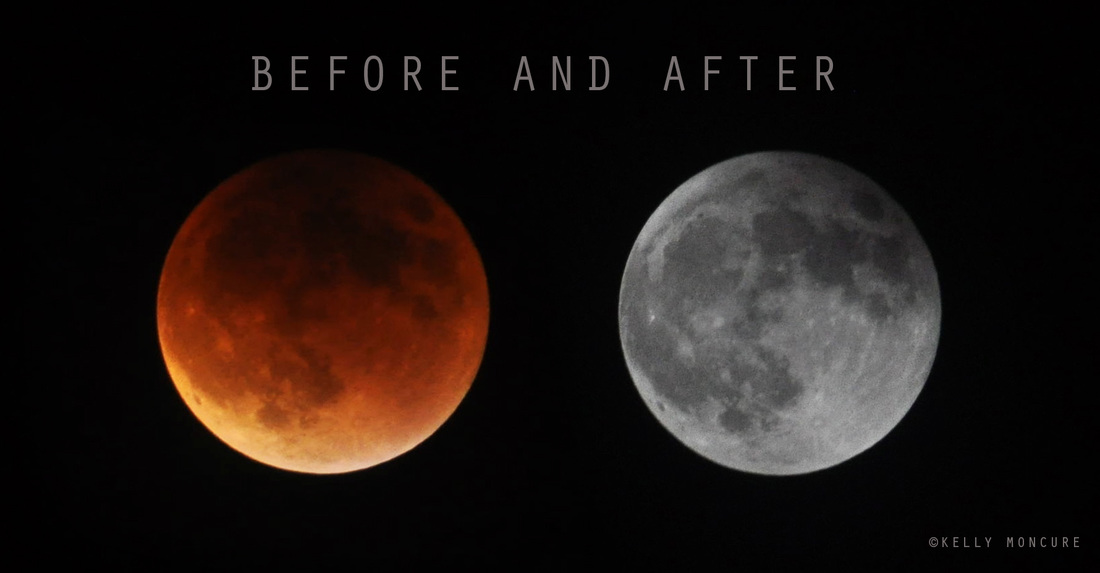
To photograph the moon:
1. Use a tripod! A flat surface will only allow you to shoot straight, and shooting the moon means that you'll be shooting up and constantly re-adjusting the tripod as the moon moves throughout the night.
2. Use a shutter release cord, remote or the camera's self timer if you don't have one, so that you don't move the camera when pressing the shutter release during a long exposure.
3. Use a zoom lens and zoom in as much as you can to the moon. It's okay if it's not a super fancy lens, this was shot using a 15 year old $100 lens. Focus in on the craters and details on the moon.
4. ISO 1250- 1600, so that you can use as fast a shutter speed as you can without losing detail-the longer the shutter speed, the more chances you have the camera will shake even slightly in the wind, resulting in an out of focus photograph.
5. Aperture priority of f/5.6 since you are not worried about capturing any details other then the moon.
6. Bracket your exposure, meaning over expose and underexpose the photograph from what the camera is telling you. Generally the camera will overexpose the moon, so you'll get nothing but a white blob in the sky. Use the exposure compensation button (the +/- button below the shutter release) and change the exposure to -0.5, then -1.0, then -1.5 and so on, until you start seeing detail in the moon. You may go as far as -5.0 exposure compensation to get what you need.
7. Take a fair amount of photos and keep refocusing as the night progresses. The photographs may look focused on the camera's display, but you won't really see if they're completely in focus until you upload them onto your computer screen.
Halloween
ISO 400, f/8, 1/2,000
ISO 400, f/8, 1/5,000
Principles of Art
Balance

ISO 800, f/8, 1/2,000
This is a photo I took of two students walking down the hallway. This is a good example of balance because if you cut the photo in half it would be a whole different picture. This is successful because it shows the balance in the photo.
Proportion
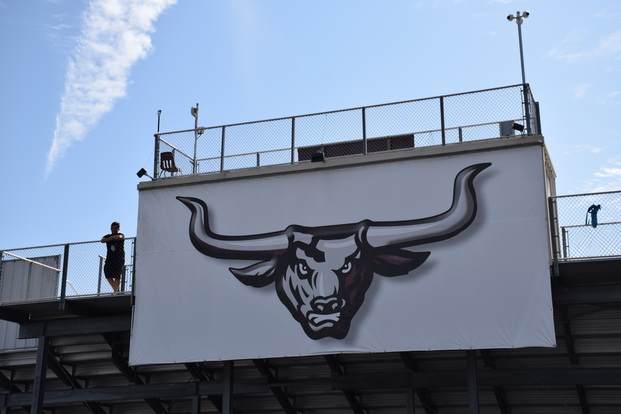
ISO 400, f/8, 1/600
This is a photo of a student(Ryan) standing next to our longhorns sign near the football field. This photo has proportion because you can tell the big difference in size. It is a successful photo because the size difference is easily noticeable and that makes up proportion.
Rhythm
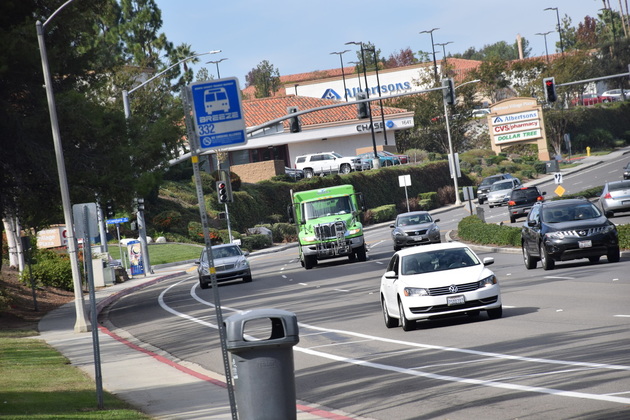
ISO 400, f/8, 1/250
This is another great example of rhythm because all of the vehicles are heading in the same direction and looks as if they are all going the same exact speed. I chose to take a photo of cars because I know all the cars would be going the same way, I just had to wait until there was a right amount of cars coming because it wasn't a very busy street. This photo is successful because it really shows the rhythm and it wouldn't be hard to guess what principle is in this photo.
Emphasis
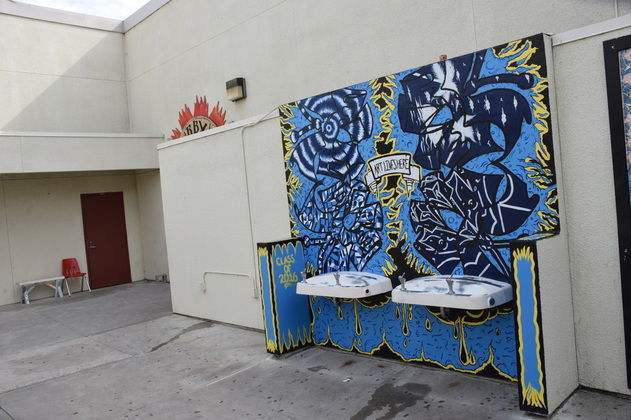
ISO 400, f/8, 1/640
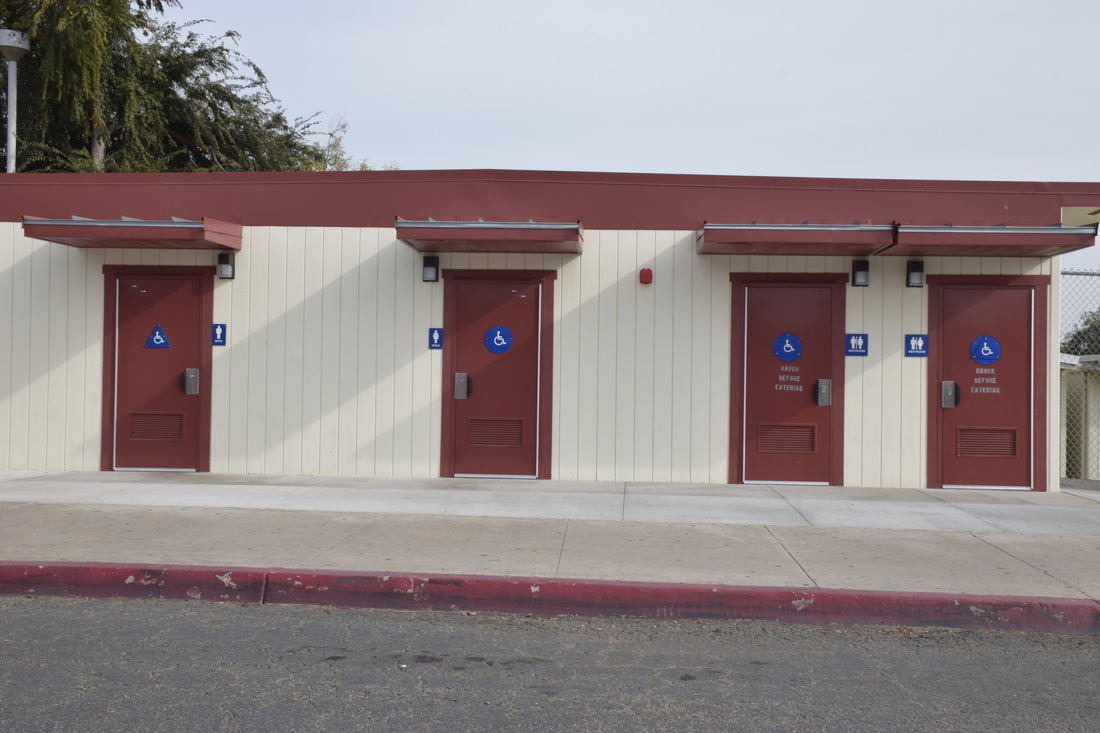
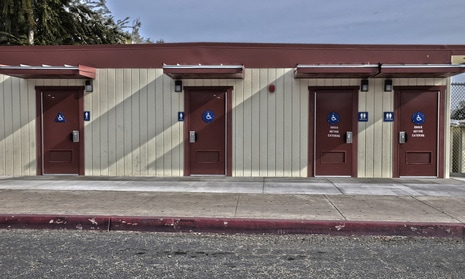
This is a very good example of emphasis because the variety of colors the mural has, unlike the plain wall. This is a photo I took of the mural right in front of the 200 bathrooms. This is a successful photo because it really shows the principle of emphasis by the use of many bright colors.
Harmony
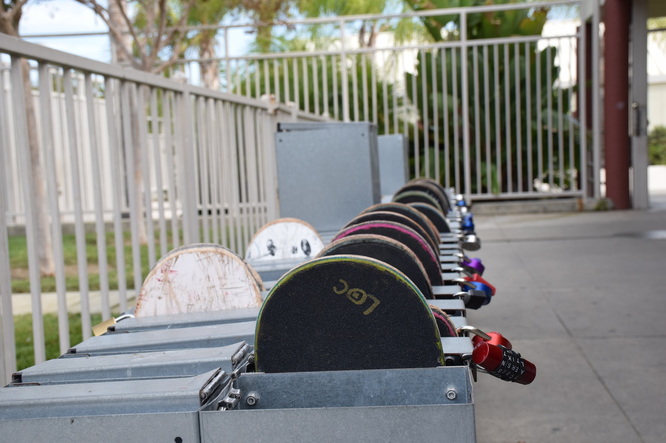
ISO 400, f/8, 1/400
This was kind of a difficult idea to come up with but I chose to take a photo of the skateboard rack. I came up with this idea because I knew everything would be in the same direction such as a street full of cars. This is successful because when viewing it you notice the harmony in it because the nice background of trees, everything goes together really well.
Variety
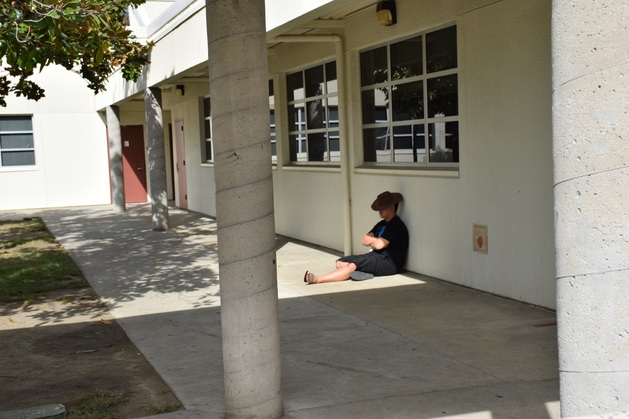
ISO 800, f/8, 1/3,200
This is a photo I took of a student(Ryan) sitting on the ground on campus with a cowboy hat on. I chose this because you never see someone on campus just sitting with a silly cowboy hat on. This photo is successful because I really captured the variety in it. I did so because you never run into someone looking like that on school campus.
Unity

ISO 400, f/8, 1/4
This is a photo I took of the bookshelf in the library. I took this because I knew the librarians keep everything in line and clean so it would be a good photo for the principle of unity. This photo is successful because everything looks in place just like unity should.
The Elements and Principles of Art
Line
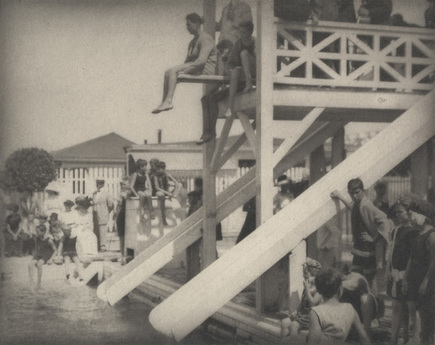 Alfred Stieglitz, The Pool, 1910, www.mom.org
- In this photo there is an element of line. The element in this photo is on the slide that is going into the pool. The line in this photo is a big part of it because it one of the first things you see when you take a look at the photo.
- - A line is one dimensional and can vary in width, direction, and length. Lines also can define the edges of a form. Line can be horizontal, vertical, or diagonal, straight or curved, thick or thin. Lines lead your eye around the composition.
Color
 Jimmy Chin, http://thephotosociety.org/member/jimmy-chin/
- In this photo there is an element of color. The element of color is mainly on the tent but also in the night sky. The color makes this photo successful because it makes the image pop out to its viewers and looks very nice.
- Color has three main characteristics: hue (red, yellow, green), value (how light or dark it is), and intensity (how bright or dull it is). Colors can also be described as warm (red, yellow), or cool (blue, green).
- Furthermore, Monochromatic- one color plus its tints (adding white) and shades (adding black). - Complimentary Colors- colors opposite each other on the color wheel (ex. Green and red). -Analogous Colors- colors next to each other on the color wheel. (red and orange)
Form
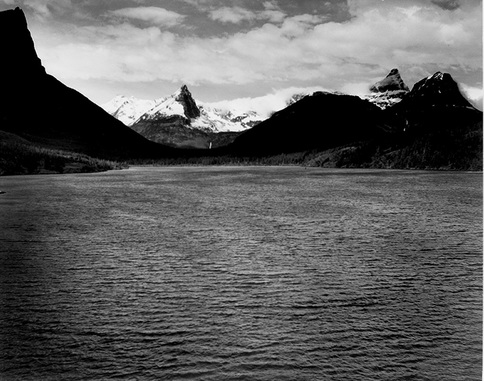 Ansel Adams, St. Mary's Lake Glacier National Park, https://www.archives.gov/research/ansel-adams
- An element of form is in this photo. The form in this photo is in the water where you can see the clouds shadowing off of it. This element made the image successful because it shows how real the photo actually is.
- Form is three dimensional, has height and width and depth.
- Photographers emphasize form by the use of highlights and shadows.
Texture
 Coconut Grove, North Shore, Oahu, Hawaii, https://clarklittlephotography.com
- This photo has an element of texture in it. When viewing this photo it looks as you can feel the texture of the water because how nice of a picture this is. This element makes this photo successful because it makes the photo look so clear like if it's right in front of you. So close you can touch it.
- - The surface quality of an object that we sense through touch. All objects have a physical texture (think- horsehair, dolphin smooth).
- Ina two dimensional work, texture gives a visual sense of how an object depicted would feel in real life touched.
Space
 Travis Burke
- The element in this photo is space. The photographer took the photo showing the full background which is the element of space. This made the photo successful because it gives us a look of the location and allows us to see the nice background of where the image is taken.
- Real space is three dimensional. Space in a work of art refers to a feeling of depth or three dimensions. It can also refer to an artist’s use of the area around the picture plane.
- Positive Space- The space occupied by the primary object.
Negative Space- The space around the primary object.
Value
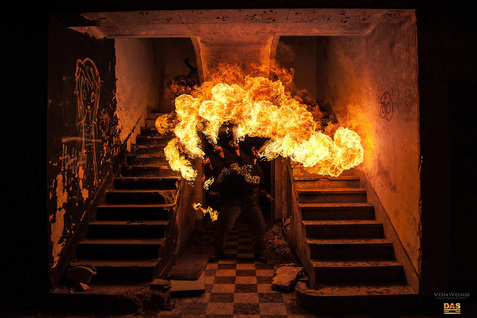 Ben Von Wong, Andrey Das meets Von Wong, www.vonwong.com
- This photo has an element of value. The value in this photo is the vibrant color and shadowing included in it. The bright orange and red brings out the value in this image.
- Value is the lightness of the darkness of a surface. It is used when talking about shading, but also is important in the study of color
Balance
 Clark Little, Closeout Set, clarklittlephotography.com/collections/main-gallery
- This photograph represents balance because if you took this picture and cut it in half, it would be two balanced proportions. I understand why this photography is successful because it is very pleasing.
- Balance is similar to our physical sense of balance. It is how the artist uses opposing forces in a composition that result in visual stability.
- Most successful compositions achieve balance in one of two ways: symmetrically (the same on both sides, like a butterfly wing or asymmetrically
Proportion
 Jimmy Chin, http://www.nationalgeographic.com/contributors/c/photographer-jimmy-chin/#/3994.jpg
- This photo includes the principle of proportion. With the large mountain and the smaller man, that is why this is a perfect photograph for proportion. It is successful because it is an unbelievable sight.
- Proportion relates to the relative size and scale of the various elements in a design. Specifically, the relationship between the objects
Rhythm
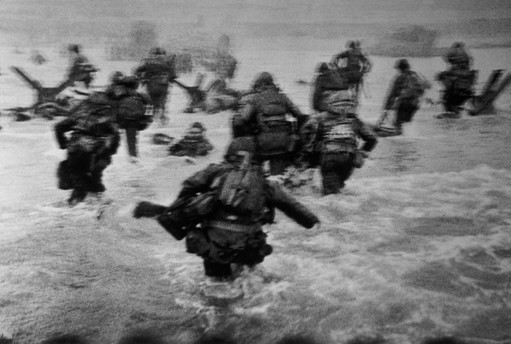 Robert Capa, U.S Troops assaulting Omaha Beach, June 6th, 1944, wwwpro.magnumphotos.com
- This photo has a principle of Rhythm, the photo has rhythm because every person captured i the photo are moving into a different rhyme of movement.
- Rhythm in an artwork indicates movement by the repetition of elements. Rhythm can make an artwork seem active.
Emphasis
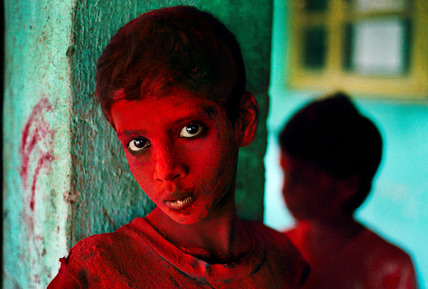 Steven McCurry, Red Boy, 1996
- When you look at this photograph, the first thing you notice are his eyes. Steven McCurry's photographs constantly focus on the eyes of the character in the photograph, and that is one reason why he is so successful.
- To make one part of an artwork dominant over the other parts. It attracts the viewer’s eyes to a place of special importance in an artwork.
Harmony
 Clark Little, Cast Away, North Shore, Oahu, Hawaii, clarklittlephotography.com
- This photograph immediately makes you feel happy. The colors and the water and sky bring the harmony aspect to it. This photograph is very successful because it is so amazingly pleasing to the eyes.
- The pleasing quality achieved by different elements of a composition interacting to form a whole. Harmony is often accomplished through repetition of the same similar characteristics.
Elements of Art
Line
ISO 400, f/8, 1/250
This photograph I took represents the element of line. It represents line because the main focus is in the lines on the wall. This photograph is is successful because it can be pleasing to someone's eye to see a photo with vibrant colors of the whit wall and nice line in it.
Color
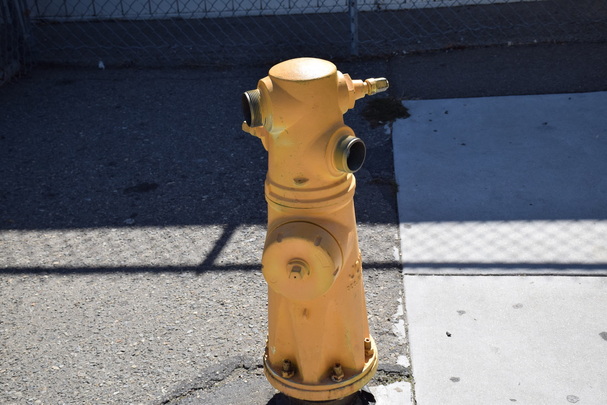
ISO 400, f/8, 1,1500
The first thing I think about when viewing this photo is the bright yellow and orange fire hydrant. This an a successful photo because the colors pop right out at you.
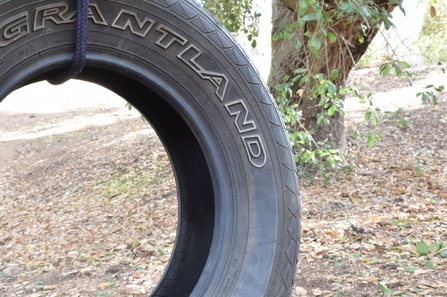
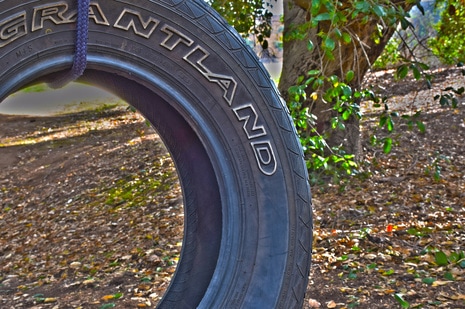
Shape
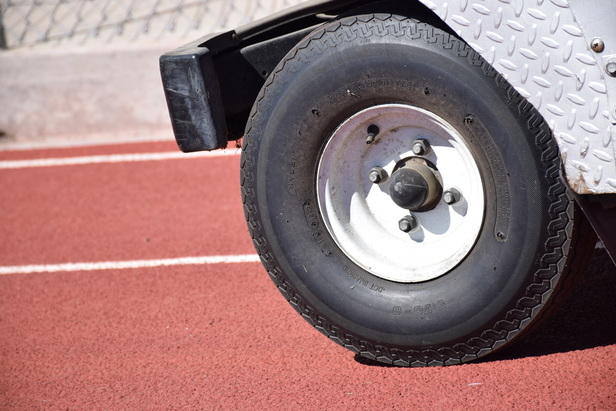
ISO 400, f/8, 1/1500
The shape of the tire is a perfect round circle. That is the first thing you really look at when you first see the photo. What makes it successful is the focus on the tire and the background.
Form
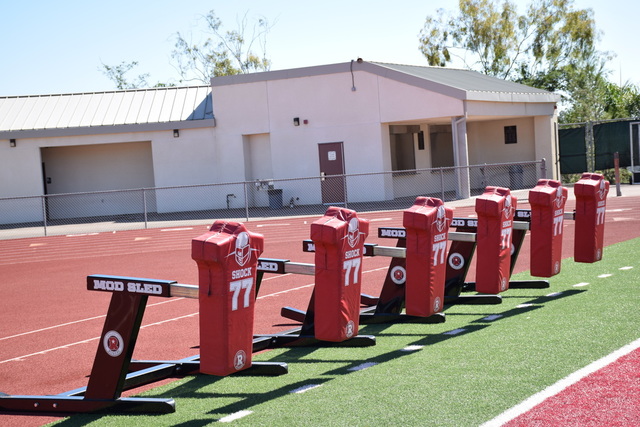
ISO 400, f/8, 1,1000
This photo represents the element of form because the form of the mod sleds. The mod sled is the main subject in the photo cause it looks like you can touch it. This is a successful photo because it makes the mod sled look so real focusing on it.
Texture
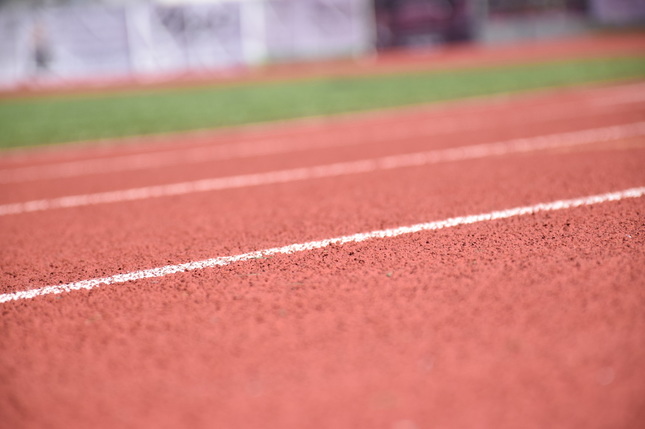
ISO 400, f/8, 1,1000
My main goal while taking this picture was to get the texture of the track. I zoomed in and used a fast shutter speed to capture the very little details of the turf, which makes the grass look so detailed. This photo is successful because i captures the texture so good as if you can feel it. It's a very detailed photo.
Space
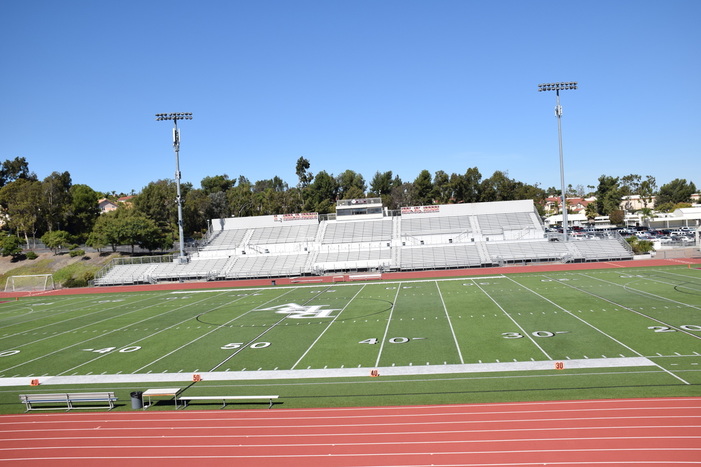
ISO 400, f/8, 1,2000
When I took this photo I was very far away from what I wanted the subject to be. Me being so far away and capturing the distance really gives you a good look of the whole football field. The success in this photo is just how vibrant the colors look and how much you can see in the photo.
Value

ISO 400, f/8, 1,350
Around this photo you see bright colors but having the subject so dark gives it value. That is exactly what value shows. It shows the dark shadows and colors of the photograph. This photo is successful because I captured the dark item in the middle and which leaves the colors on the outside out of the subject.
Fast Shutter Speed
ISO 1600, f/9, Shutter Speed 1/800
ISO 1600, f/10, Shutter Speed 1/800
ISO 1600, f/9, Shutter Speed 1/800
ISO 1600, f/9, Shutter Speed 1/800
|
ISO 1600, f/11, Shutter Speed 1/800
ISO 1600, f/9, Shutter Speed 1/800
ISO 1600, f/10, Shutter Speed 1/800
ISO 1600, f/10, Shutter Speed 1/800
|
1. I took there photos under the settings of ISO 1600, aperture f/10 & f/8, and shutter speed 1/800
Respect

For our RESPECT assignment I took a photo of another student eating an apple. I came up with this idea because every other idea I came up with was either taken or just not good enough. I feel like respecting your body is very important because respecting your body also ties in with your health, and I’m sure no one would enjoy having bad health. Respecting your body means to eat healthy, try to exercise, and turn down drugs and alcohol. Eating healthy isn’t easy but after realizing all the changes that will occur to your body you’d be happy with your decision. Other than changing your appearance eating healthy can also save money. It can save you money because you eat way less than you did before.
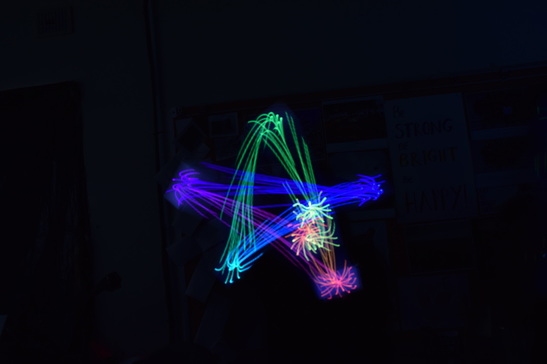
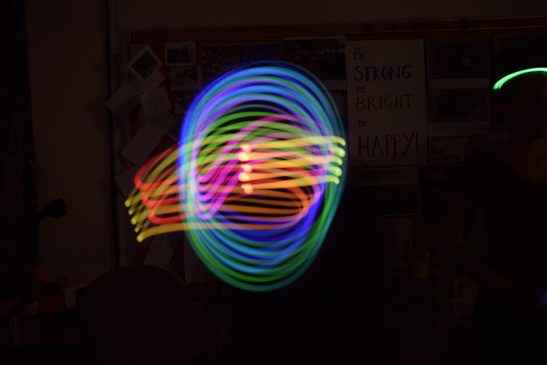
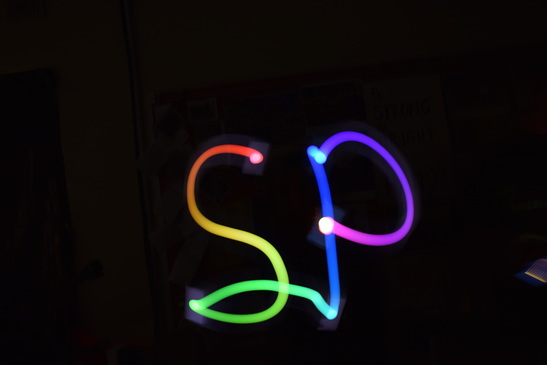
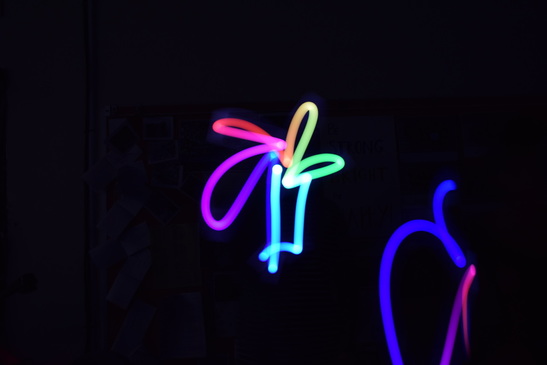
Light Painting
ISO 200, f/5.6, Shutter Speed 6.0
ISO 200, f/5.6, Shutter Speed 6.0
ISO 200, f/5.6, Shutter Speed 6.0

ISO 200, f/5.6, Shutter Speed 6.0

ISO 200, f/5.6, Shutter Speed 6.0
ISO 200, f/5.6, Shutter Speed 6.0
Shutter Speed
ISO 200, f/13, 1/3
ISO 200, f/9, 1/60
ISO 200, f/5.6, 1/250
ISO 200, f/2.8, 1/000
- To change the camera to Shutter Speed you have to turn the dial to "S" then the nob until you reach what Shutter Speed you'll like
- While take the photos I noticed the smaller the Shutter Speed the slower the lens close as taking the photo
- You use fast Shutter Speeds when you want an image to freeze in the air
Shutter Speed Notes:
- While take the photos I noticed the smaller the Shutter Speed the slower the lens close as taking the photo
- You use fast Shutter Speeds when you want an image to freeze in the air
Shutter Speed Notes:
- Shutter speed are both a technical and aesthetic choice a photographer needs to make before releasing the shutter
- The shutter inside your camera controls the duration of time the sensor is exposed to light
- Capturing blur or motion in your photograph can emphasize movement and add drama
- A fast shutter speed is often utilized to freeze the movement of a subject
- A slower shutter speed can be used to show motion and visualize
- Shutter speeds are expressed as seconds or fractions of seconds
- As a general rule to prevent unintentional camera shake you should avoid handholding your digital cameras at shutter speeds slower than 1/2x Focal Length
- Using a tripod can help eliminate camera shake when using slower shutter speeds
- The visual blur and suggestion of movement occurs because the subject is moving against a static background
- Layering motion of different subjects moving different directions at different speeds can set up interesting dynamics within a photograph
- Fast shutter speeds can make normal subjects appear to freeze in the air
- When photographing people running relatively close to the camera a shutter speed of 1/1000 second or faster should freeze most motion
- The distance the subject is from the camera, the speed of the subject, and the focal length of the lens will affect whether the subject is sharp or blurred
- Slower shutter speed can help convey the idea of motion and movement
- Slower shutter speeds combined with panning can help isolate the subject from a busy and distracting background
- A tripod combined with a long exposure can capture the fireworks’ trails
- Water movement can be emphasized with long exposures
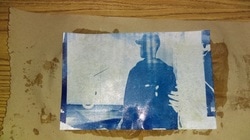
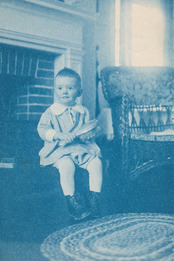
Daguerrotype and Cyanotype
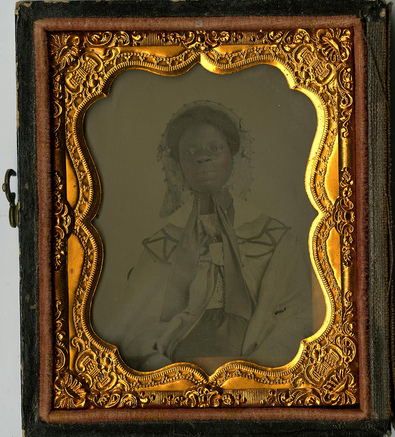
- Invented in 1839 by Louis Daguerre
- The daguerrotype was the first commercially successful photographic process in the history of photography. Each daguerrotype is a unique image on a silvered copper plate. The plate used for a daguerrotype is faced down over chloride of bromine fumes. The two chemicals combine with the silver coating of the plate to form a light sensitive surface
- The daguerrotype was the first commercially successful photographic process in the history of photography. Each daguerrotype is a unique image on a silvered copper plate. The plate used for a daguerrotype is faced down over chloride of bromine fumes. The two chemicals combine with the silver coating of the plate to form a light sensitive surface
|
|
|
- Invented by John Herschel in 1842
- Potassium ferricyanide and Ferric ammonium citrate are mixed with water separately. The two solutions are then blended together in equal parts. Paper, cards, textiles or any other naturally absorbent material is coated with the solution and dried in the dark. Objects or negatives are placed on the material to make a print. The cyanotype is printed using UV light, such as the sun, a light box, or a UV lamp. After exposure the material is processed by simply rising it in the water. A white print emerges on a blue background. The final print is dried and there goes your cyanotype.
- Potassium ferricyanide and Ferric ammonium citrate are mixed with water separately. The two solutions are then blended together in equal parts. Paper, cards, textiles or any other naturally absorbent material is coated with the solution and dried in the dark. Objects or negatives are placed on the material to make a print. The cyanotype is printed using UV light, such as the sun, a light box, or a UV lamp. After exposure the material is processed by simply rising it in the water. A white print emerges on a blue background. The final print is dried and there goes your cyanotype.
Bully Beat Down
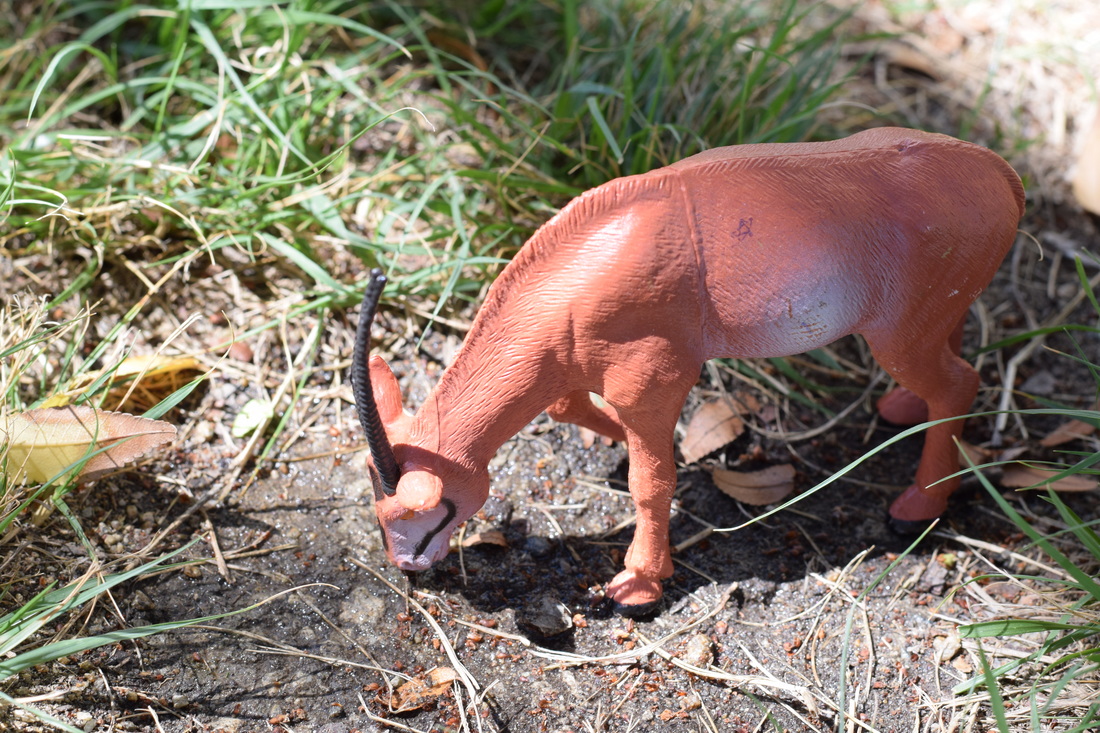
Bully Beat down. Aperture f/16 , Shutter Speed 1/45, ISO 400
It was a sunny afternoon and Roger was just resting at home. He became very bored and thought of things he could do. He then came up with a solution of taking a walk but there was just one problem. Every afternoon at about the same time that it was the town bullies, John and Alexis come out for their daily stroll. Roger thought it was okay just to go on a walk that one day without any problems and that's exactly what he did. He is walking and grew tired so he slowed down to take a quick water break.
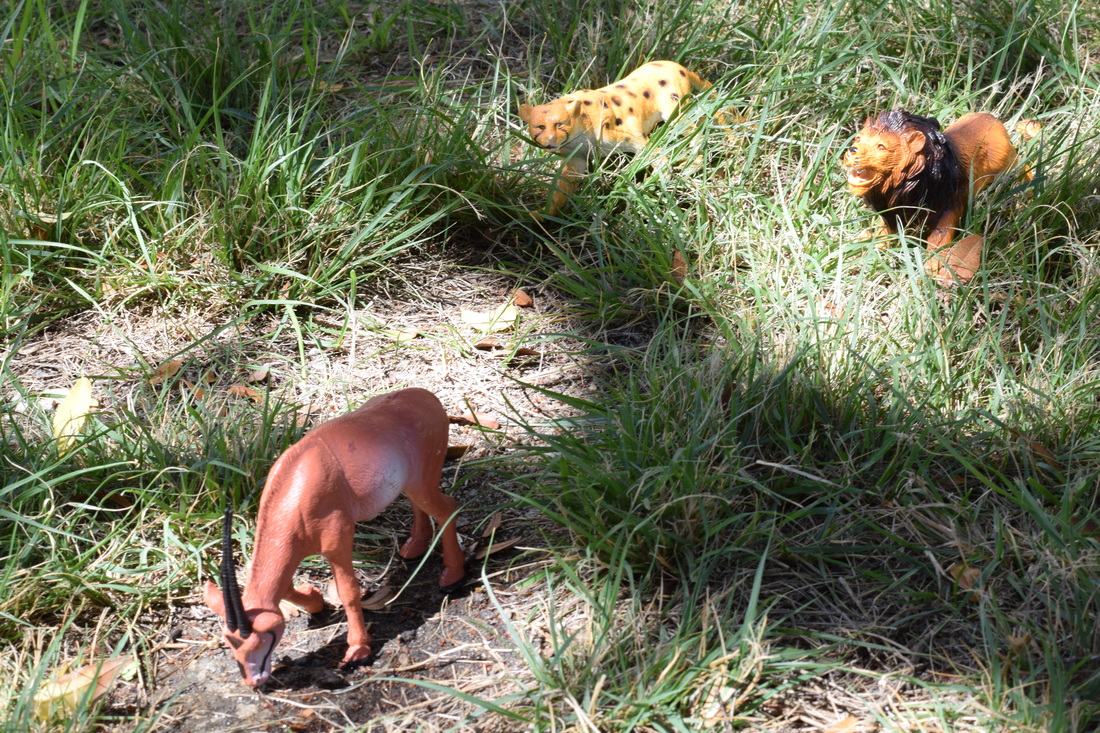
Bully Beat down. Aperture f/16, Shutter Speed 1/60, ISO 400
Roger is now taking his drink when John and Alexis pop out of nowhere. The two discuss on what they should do to Roger. Alex wants to eat him on the spot while Alexis wants to bring him back to their cave because he's a fairly big animal so if they start to eat right there they'll have to finish his whole body or else it'll rot. John complains that he hasn't eaten all day and Alex get tired of his whining.
Bully Beat down, Aperture f/8, Shutter Speed 1/180, ISO 400
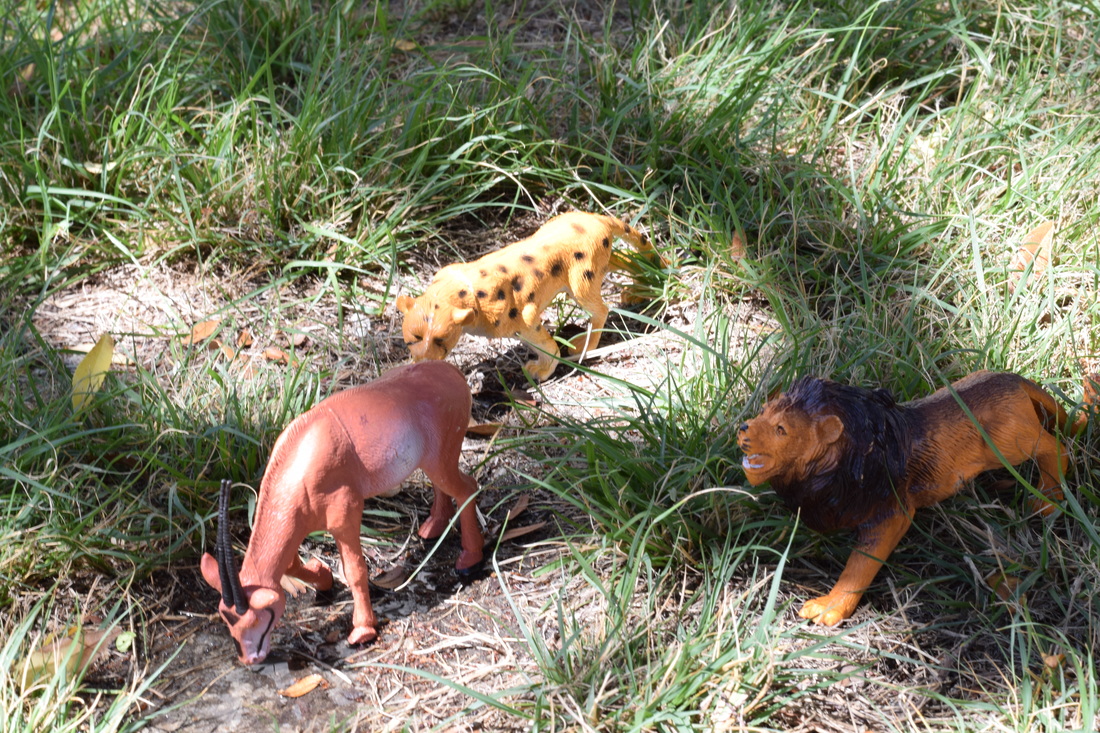
They decide to go with Alexis' idea because she grew sick of him saying he was hungry at the moment. Roger is still enjoying the water when the two are are creeping up closer and closer. The plan was that John goes for his neck and Alexis goes for his legs so he has no way of breaking away.

Bully Beat Down, Aperture f/8, Shutter Speed 1/250, ISO 400
Just as they strike, the town hero, Batman appears. Batman was known for saving lives very quickly at the last second. No one ever knew why he always showed up to the scene so late but as long as they were getting saved they couldn't complain what time he comes. He then attacks John and Alexis.
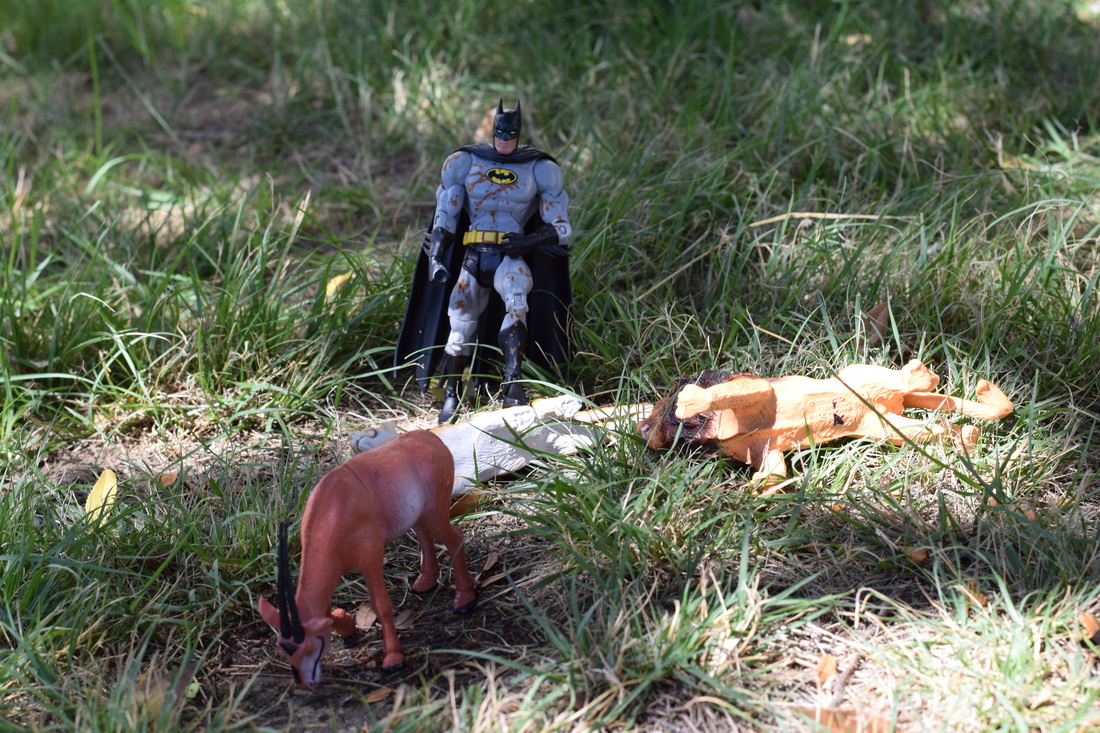
Bully Beat Down, Aperture f/1.8, Shutter Speed 1/250, ISO 400
Batman uses his quick hands and footwork to defeat the bullies. The two are taken care of in an instant then Batman disappears from the scene. Roger turns around to walk back home and sees the two laid out dead right behind him. He just ignores them and continues back home.
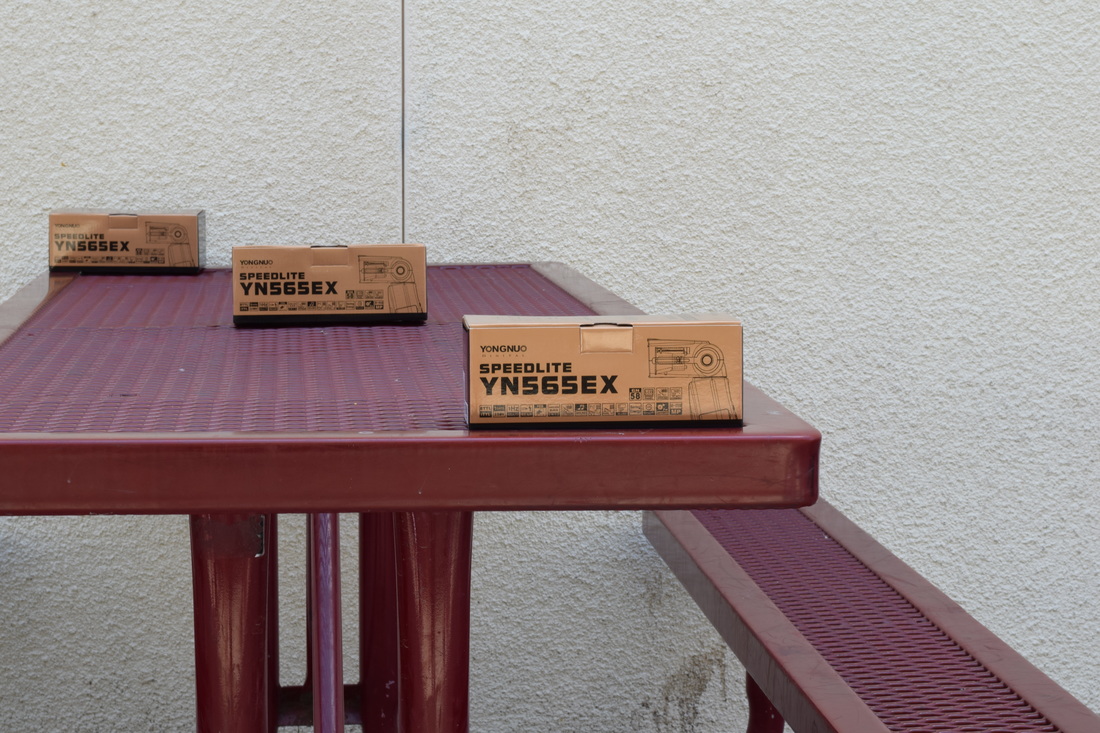
Aperture Priority
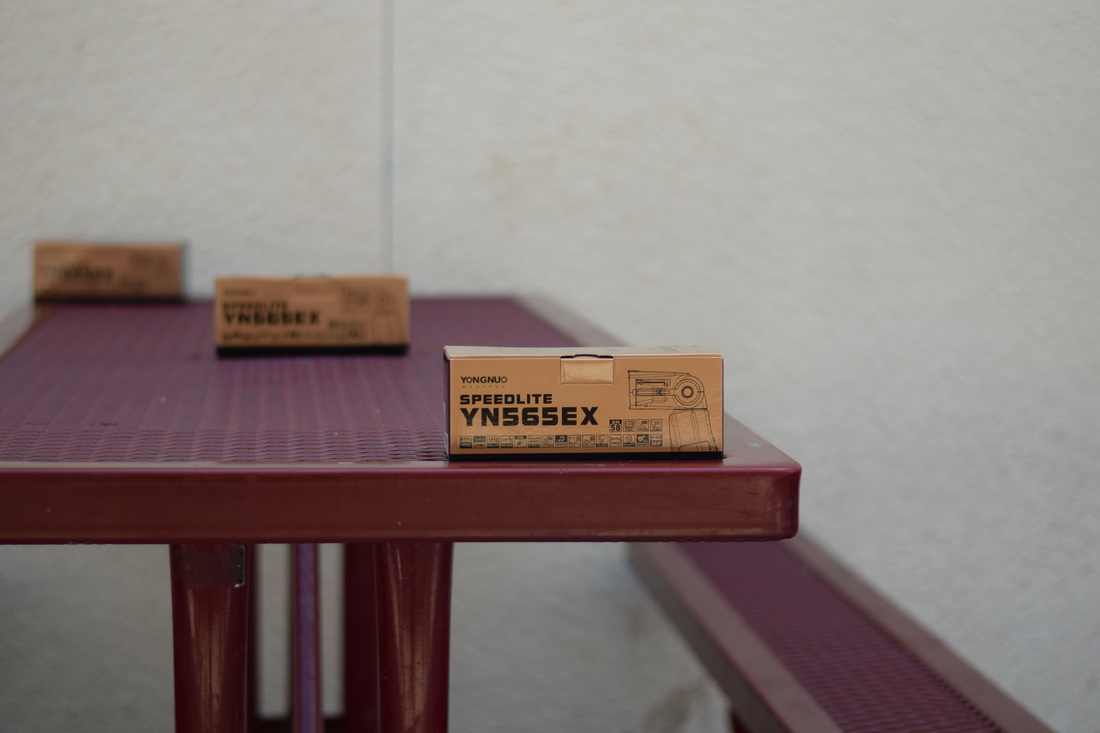
Aperture f/1.8, Shutter Speed 1/2000th of a second, ISO 200
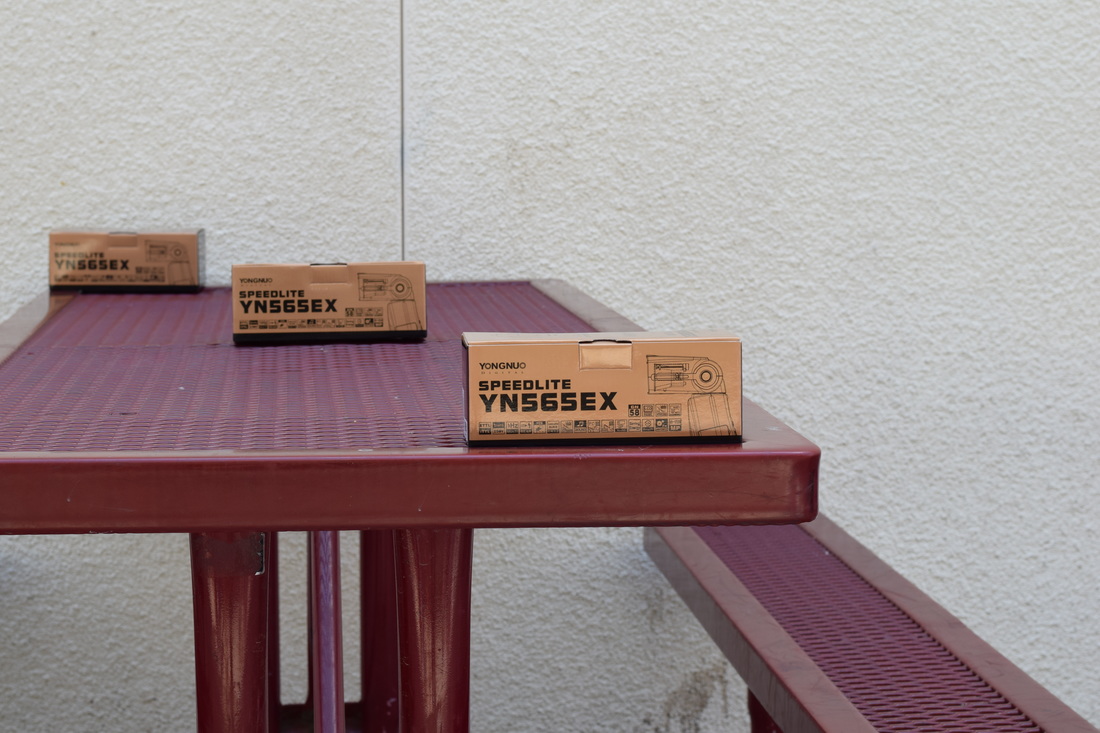
Aperture f/8, Shutter Speed 1/100th of a second, ISO 100
Aperture f/16, Shutter Speed 1/25th of a second, ISO 200
Being taught about aperature gave me a better understanding about what aperature is and what exactly it does. Aperture is the depth of field so it made a lot more sense after viewing the photos on the computer. I learned that the bigger the aperture the smaller the f/stop and vise-versa, the smaller the aperture the bigger the f/stop. With the different apertures the camera focuses differently. The first photo taken with an f/1.8 of the three boxes, showed the first box in focus but the two behind it very blurred out. For the f/8 photo the second box was more focused, but for the photo taken with the highest f/stop, then the depth of field became wider and the boxes weren't blurred.
.
Notes on Aperture:
.
Notes on Aperture:
- Change amount of light
- How much something is moving
- Depth of field
- Blur
- Focus
- Subject of an image
- Aperture landscape
- Shutter speed = motion
- Aperture = depth of field
- Bigger f-stop , smaller aperture (vise-versa)
- Wider = shallow
- Narrow = deep
Digital Camera Basics
What DSLR stands for?
- DSLR stands for “Digital Single Lens Reflex”
- A DSLR is a digital camera that uses mirrors to direct light from the lens to the viewfinder, which is a hole on the back of the camera you look through to see what you are taking a picture of.
- Perspective and human proportion was made
- Exposure is the amount of light collected by the sensor in your camera during a single picture.
- If the shot is exposed too long the photograph will be washed out
- If the shot is exposed too short the photograph will appear too dark
- Almost all cameras today have light meters which measure the light in the given shot and set an ideal exposure
- The three primary controls your camera uses for exposure are aperture, shutter speed and ISO.
- Aperture
- Shutter speed
- ISO
- Simply put, aperture is a hole within the lens, through which light travels into the camera body.
- It is easier to understand the concept if you just think about our eyes. Every camera the we know today is designed like human eyes.
- In photography, aperture is expressed in f-numbers (for example f/5.6). These f-numbers that are known as “f-stops” are a way describing the size of the aperture, or how open or closed the aperture is.
- A smaller f-stop means a smaller aperture. For example f/14 is larger than f/20 and much larger than f/8.0
- Small apertures (high f/numbers ie f/22) increase the depth of field, bringing both the main subject and background into focus.
- Large apertures (low f/numbers ie f/2.8) soften background details
- Depth of field (DOF) is the distance to which objects behind and in front of the focal point appear to be in focus.
- Shutter speed, also know as “exposure time”, stands for the length of time a camera shutter is open to expose light into the camera sensor.
- If the shutter speed is fast, it can help freeze action completely
- If the shutter speed is slow it can create an effect called “motion blur”, where moving objects appear blurred along the direction of the motion
- Shutter speeds are typically measured in fractions of a second, when they are under a second
- For example ¼ means a quarter of a second, while 1/250 means one two-hundred-and-fiftieth of a second or four milliseconds
- The slowest shutter speed for handheld photography is 1/60. Anything lower than that should either be on tripod or on a straight, solid surface
- Any slower handheld shutter speed begins to get motion blur and your photography may be out of focus
- ISO is the level of sensitivity of your camera to available light.
- The lower the ISO number, the less sensitive it is to the light, while a higher ISO number increases the sensitivity of your camera
- The component within your camera that can change sensitivity is called “image sensor” or simply “sensor”
- With increased sensitivity, your camera sensor can capture images in low-light enviroments without having to use a flash. But higher sensitivity comes at an expense- it adds grains or “noise” to the picture
- Bright and sunny, 100 iso
- Cloudy, 250 iso
- Indoors, 500 iso
- Night time without a flash, 1600 iso
- M- Manual Control over aperture and shutter
- A- Aperture Priority
- S- Shutter Priority (motion)
- P- Camera sets shutter speed and aperture
- Have the camera strap around your neck at all times
- Hold the camera by the lens and hand grip if possible- treat with care!
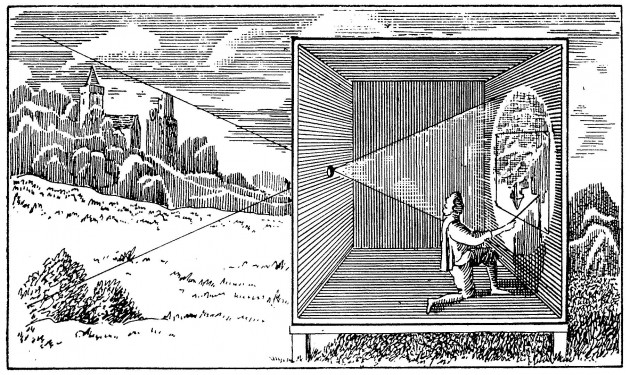
Camera Obscura
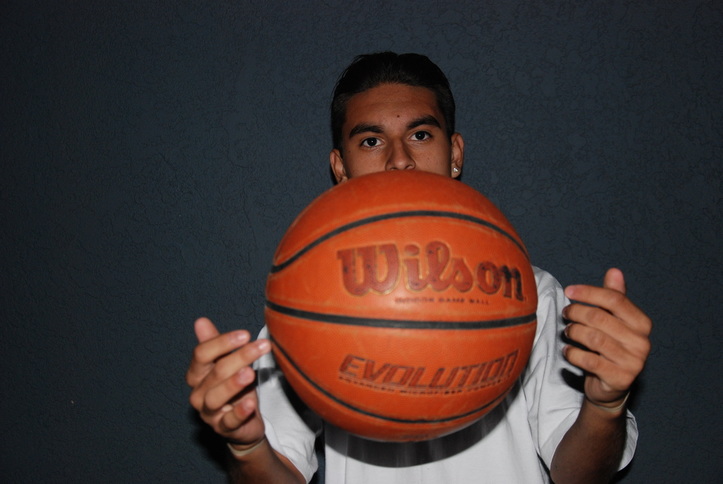
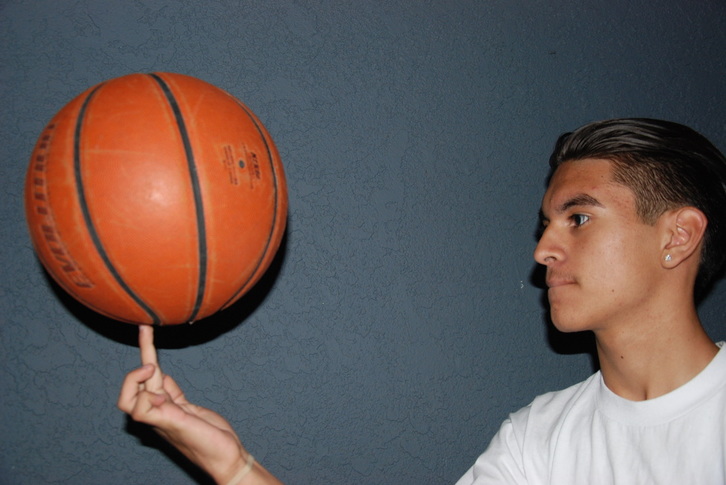
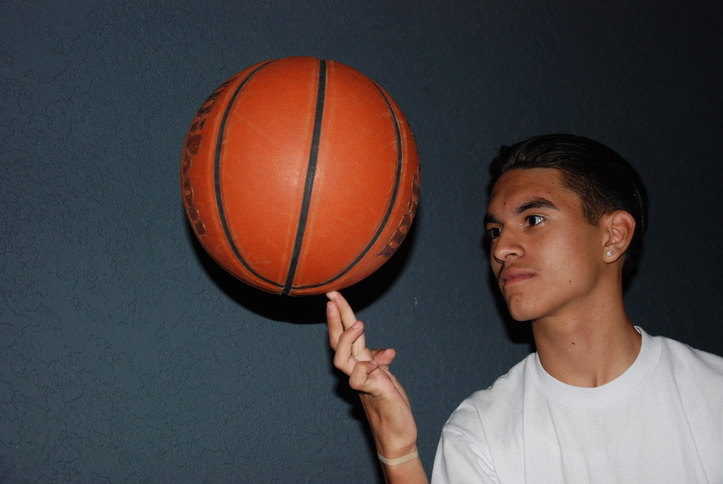
Surrealistic Selfie
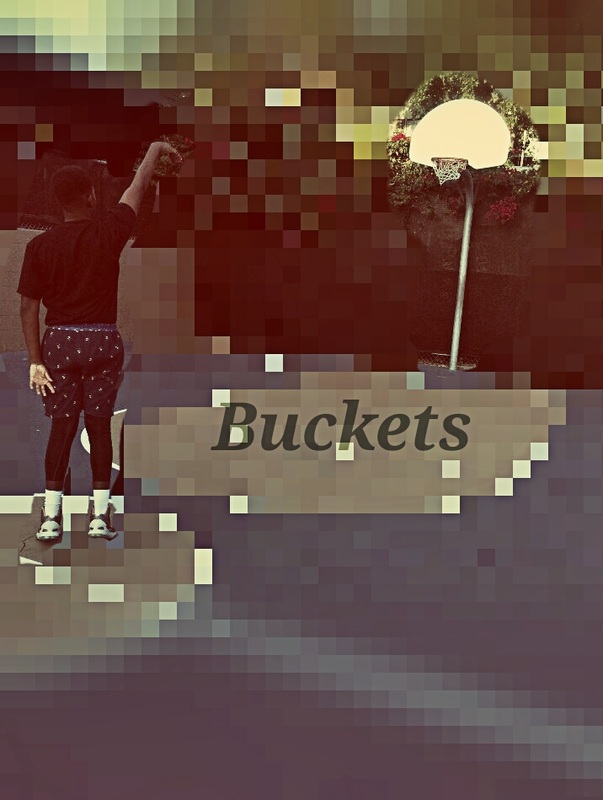
The purpose of this photo is to show the love I have for the sport. I chose to use basketball to show who I am because I've been playing the game for about 5 years now and in those 5 years I've really come to love the game. Basketball means a lot to me because it can take my mind off a lot of things at times. Basketball is always going to be something I look to just because its a fun and challenging to do. One of my favorite things about playing basketball is getting better, it feels really good knowing you've gotten better at something you love to do. This photo was made by an app named PixLr. With the app PixLr I pixilated everything in the photo except me and the hoop. The meaning of that was to show when I'm playing basketball I'm only focused on getting the ball in the hoop.
